That
last 3D model that I printed had clothes as part of the model. It made it really hard to paint. Painting miniatures is one thing, but painting a 20" model and trying not to get skin paint on the shirt or shirt paint on the skin is a different story. It's so big that any mess you make with the paint is glaringly obvious. When painting the clothes, I had to mask off the skin so that I wouldn't get paint on it. It was a real pain. In addition, keeping detail in the clothes was difficult with all the sanding and priming in order to remove the print lines. It would have been so much easier if the clothes were separate objects.
For this model, I decided to print the entire model without clothes and then sculpt the clothes out of clay, bake them in the over, and then paint them.
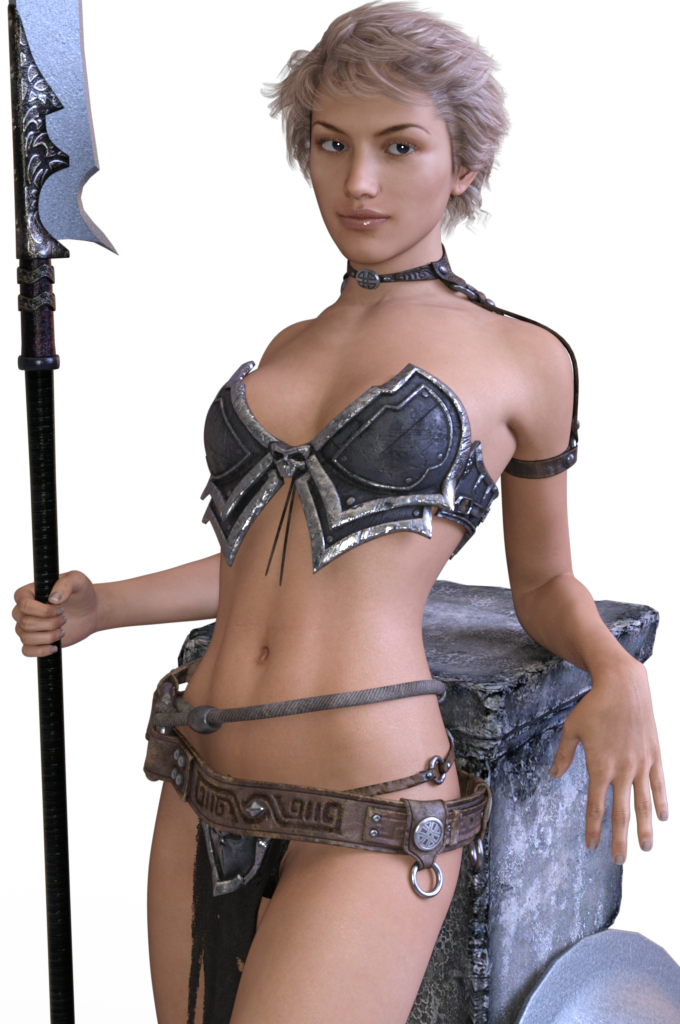
However, I haven't used clay in years and I thought I could do a much better job 3D printing and laser cutting materials instead. Rather than use clay, I decided to make the clothes out of as many real-world materials as I could.
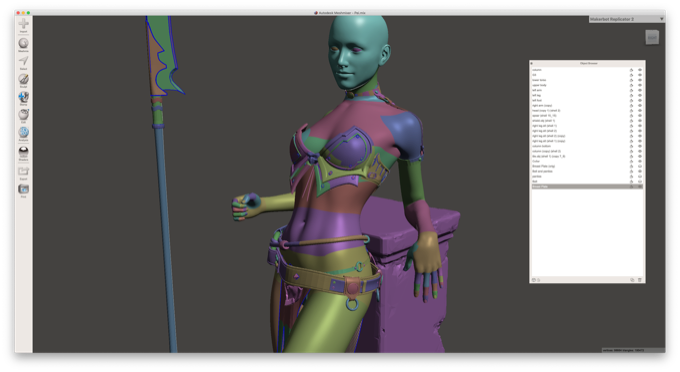
I exported the clothes from DAZ Studio into Meshmixer so that I could manipulate them in 3D space and start to get a sense of how I was going to design the clothes. I am not going to attempt to reproduce them one-to-one. I will merely use them for guidance and inspiration.
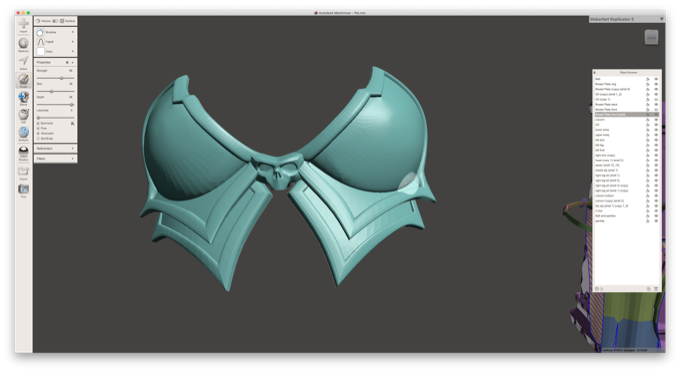
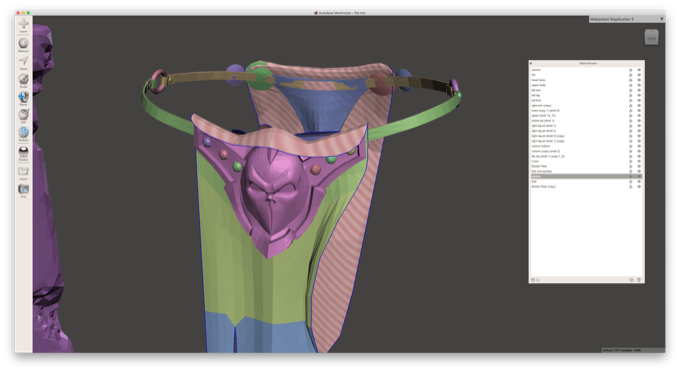
I started with the breastplate. There's a lot of fine details in there like hinges and rivets, etc. I'm sure they would print fine, but I might want to add some of those details back in later with real-world materials. I simplified the model by removing those details. I also removed the back plates. I might 3D-print those separately, or I might just make a leather strap to secure it to the model.
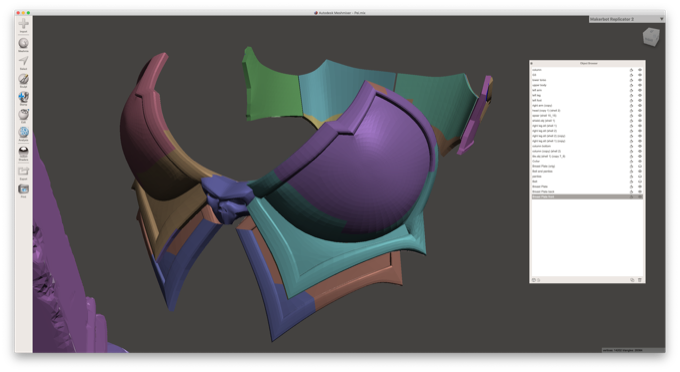
I then made it solid so that I could do a boolean subtraction with the figure so that it would conform to the body and fit perfectly.
It is such an odd shape that there was no way to print it without a ton of support material.
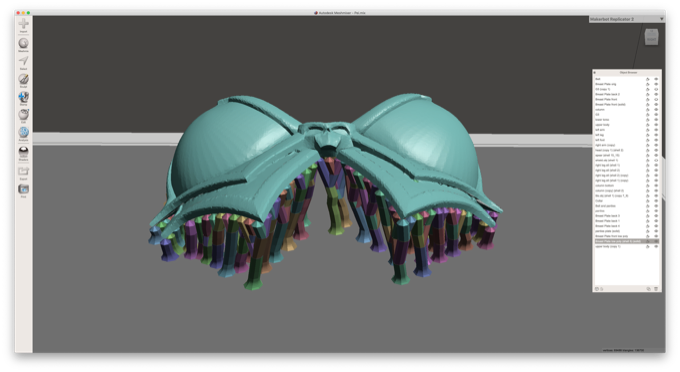
The support material added so much print time. It took 23 hours to complete with a .1mm layer height.

It was actually easier to snip the supports off than I thought, My flush cutters made quick work of it.
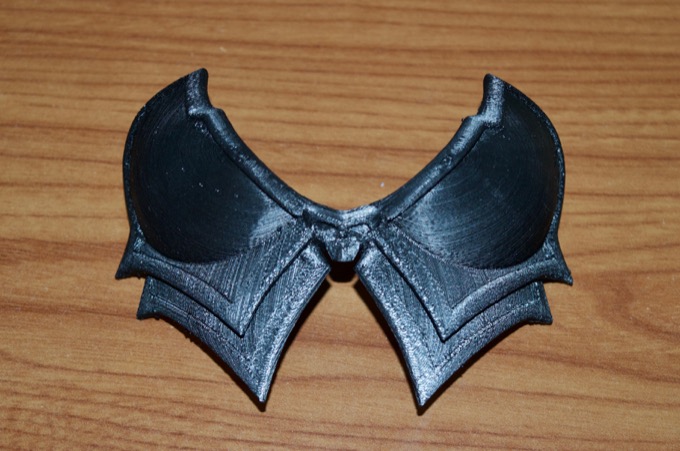
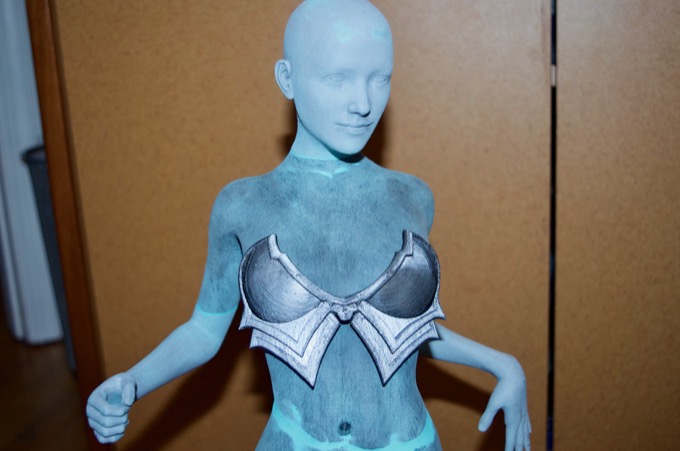
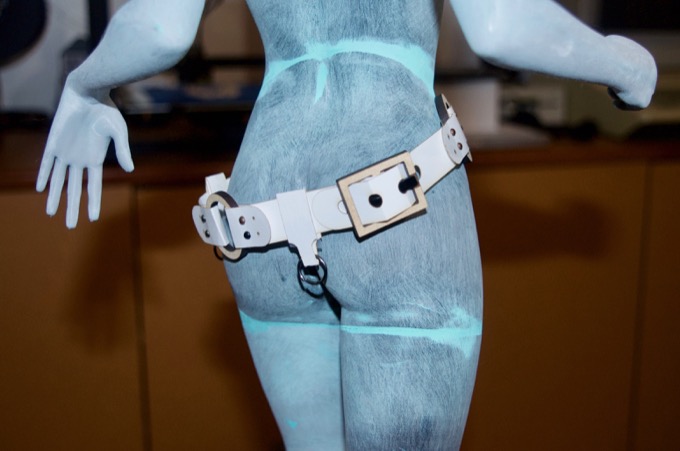
Fits like a glove. Some sanding and a coat of primer and it will look awesome. I'm going to paint it like the spear and shield.
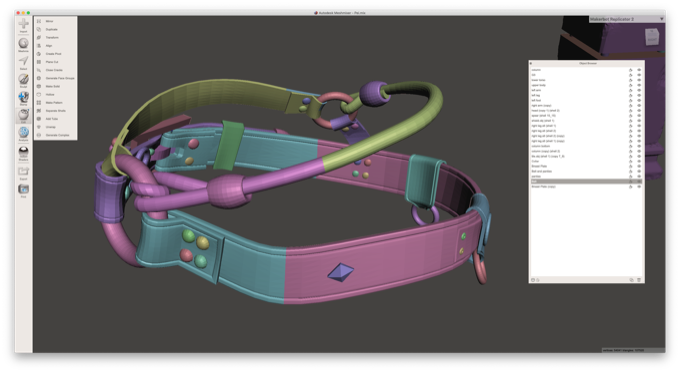
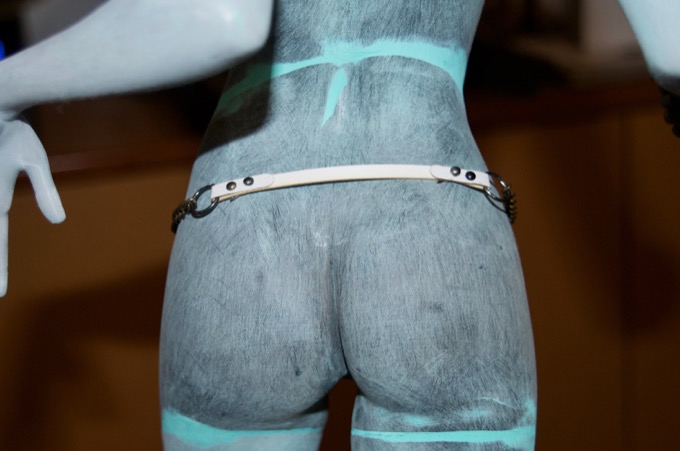
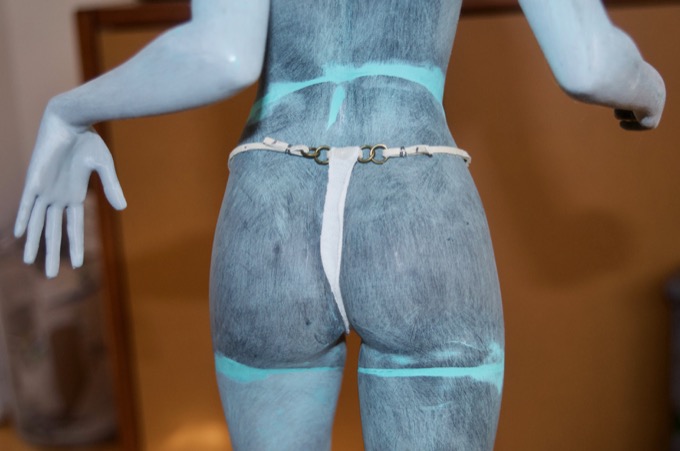
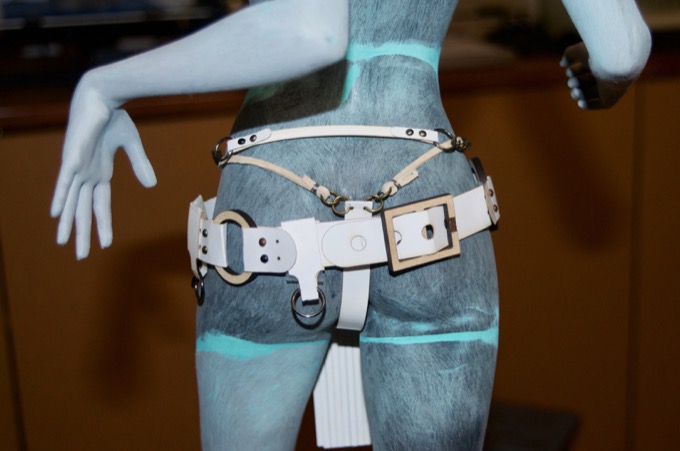
The 3D model for the belt has all kinds of small details like hoops, and loops, and studs, etc. Again, I'll just use this for guidance and come up with something of my own. I already have a pretty good idea of what I want it to look like.
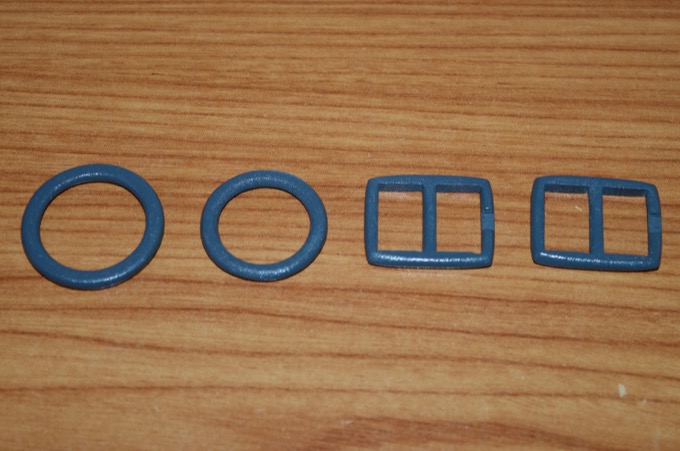
I started by cutting some paper strips and some of the hardware out of Draftboard to nail down the basic dimensions.
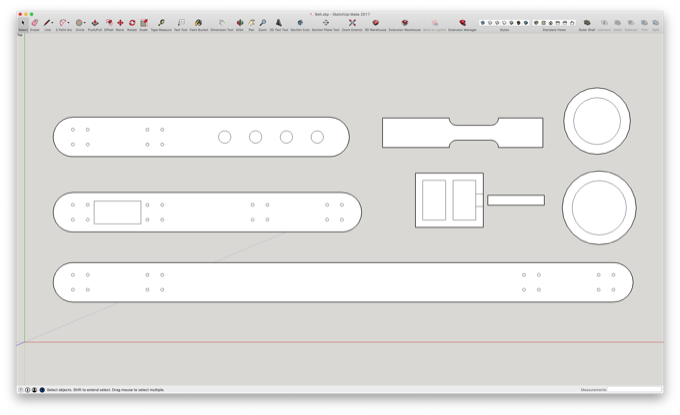
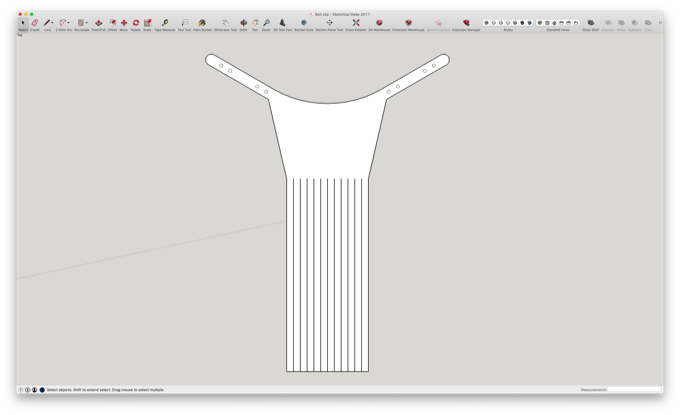
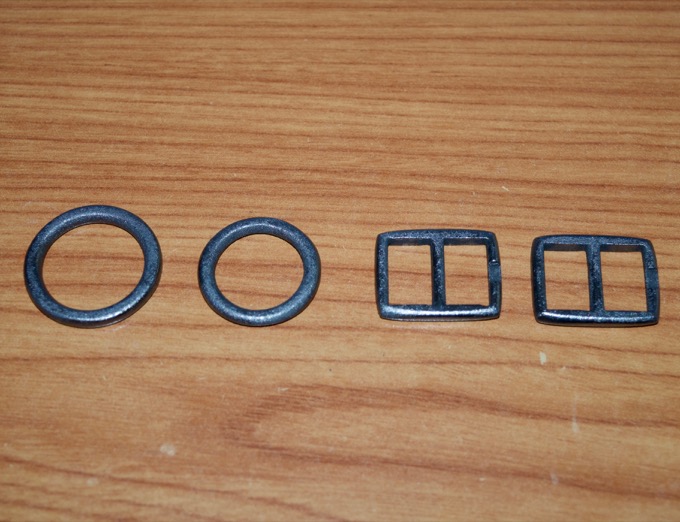
Once I had that nailed down, I designed the pieces in SketchUp.
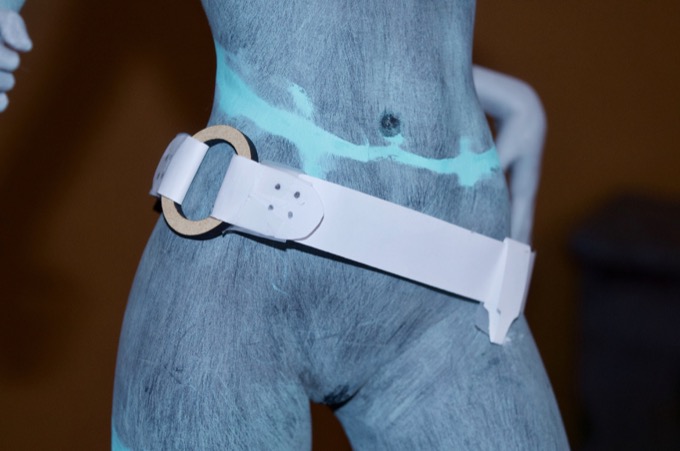
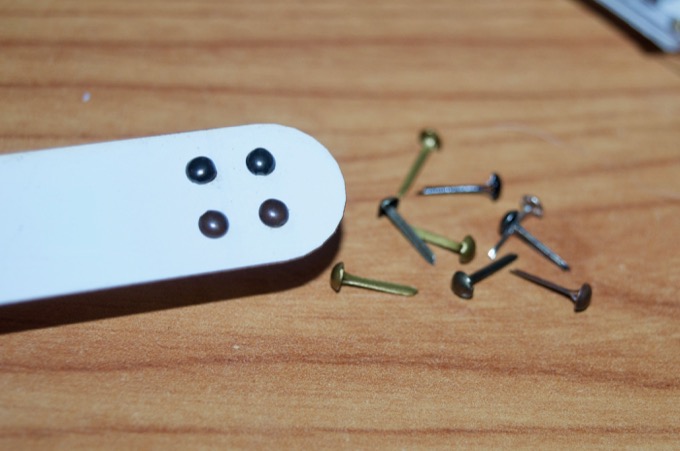
I then cut the pieces out of poster board for a final test fit. I found these really tiny brads at the craft store that perfectly emulate the look and feel of leather studs. They are the perfect scale for what I need.
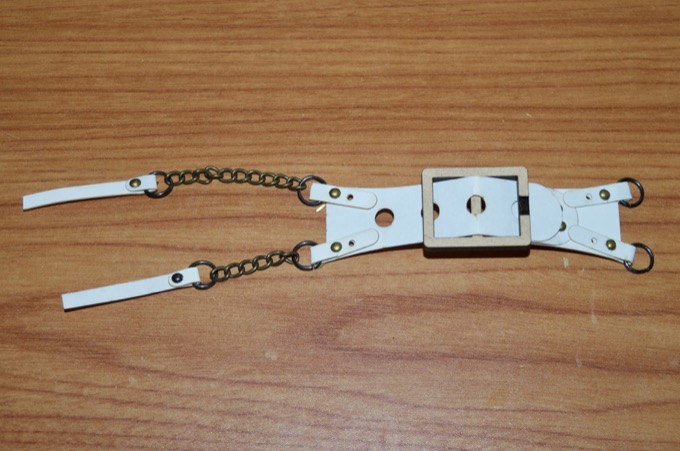
A combination of wood and bent acrylic makes for a fully functional belt buckle. I actually contemplated stealing the hardware off a 16mm watch strap, but what fun would that be?
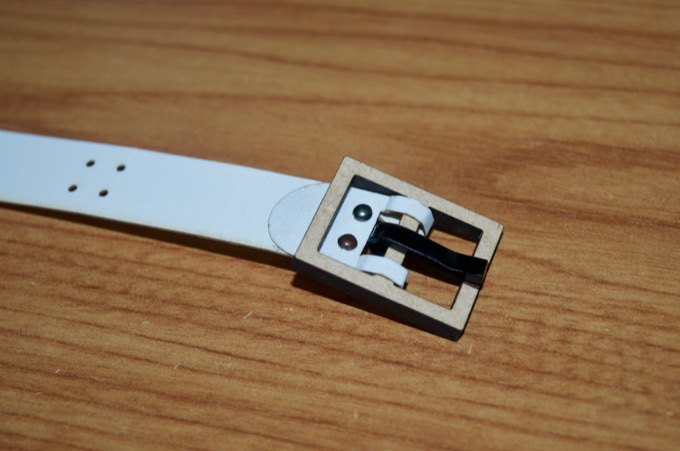
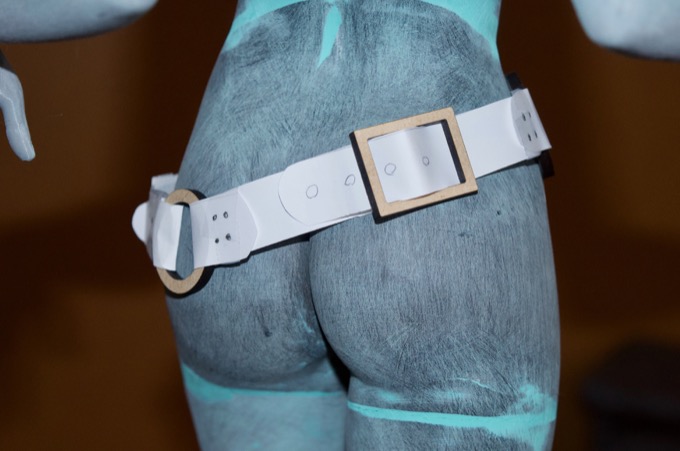
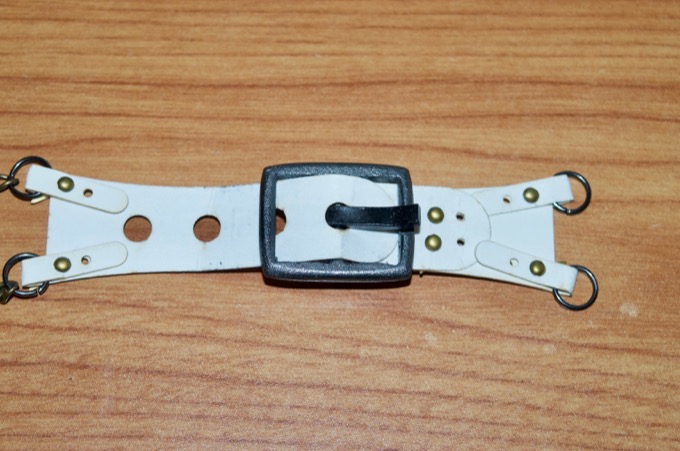
There it is. All assembled.
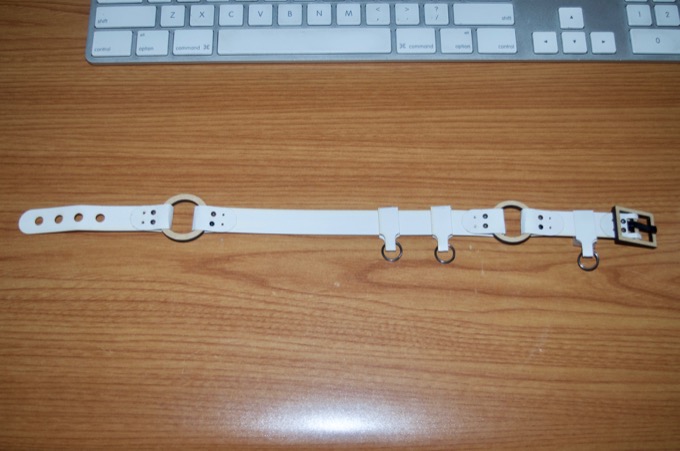
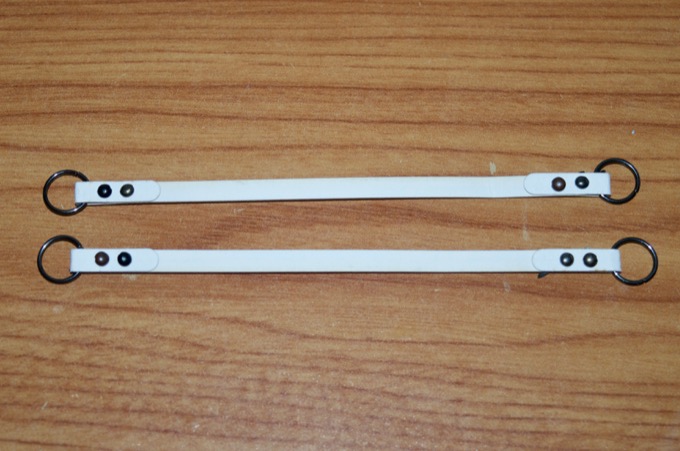
It took a few small tweaks to get the lengths of the various strips right but I finally got it.
It's going to look awesome once I cut it out of leather.
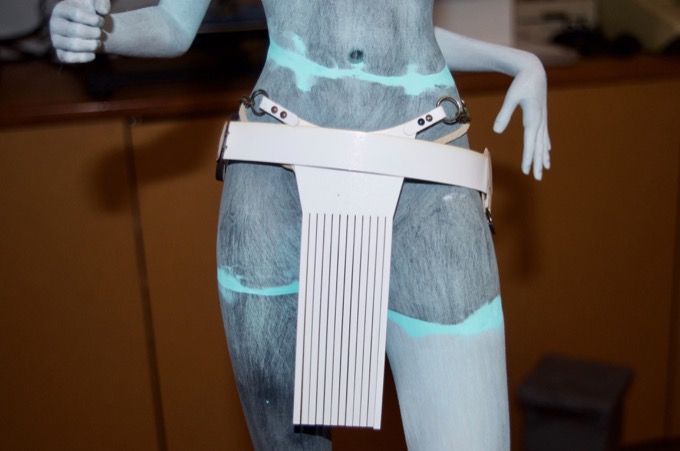
Next up is the loin cloth. The belt came out so sweet I'm going to use the same techniques to make it.
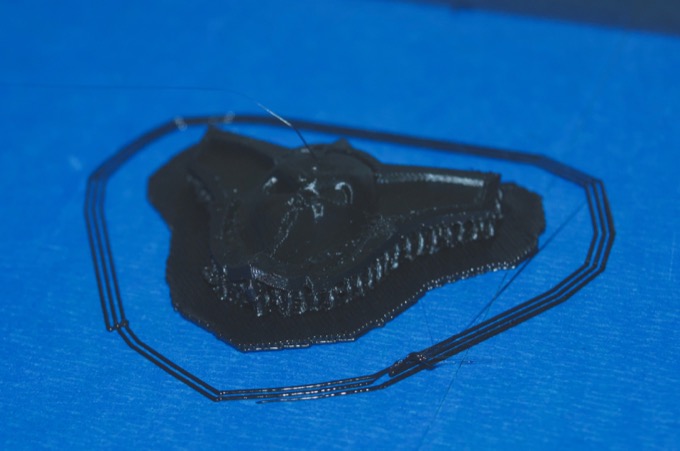
However, this part needs to be 3D-printed.
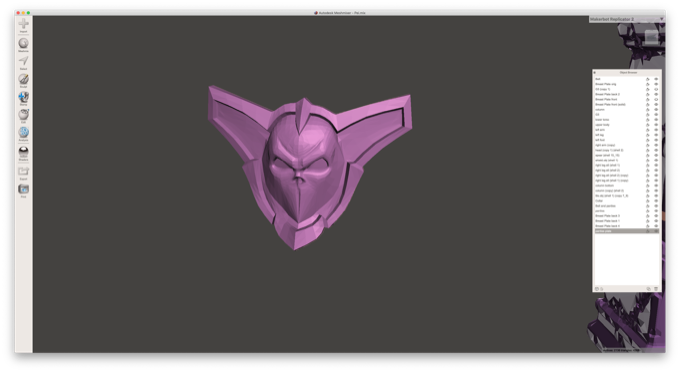
Just like the breastplate, there was no way to print it flat on the bed. The back is completely covered in supports. It took 6.5 hours to print this tiny model.
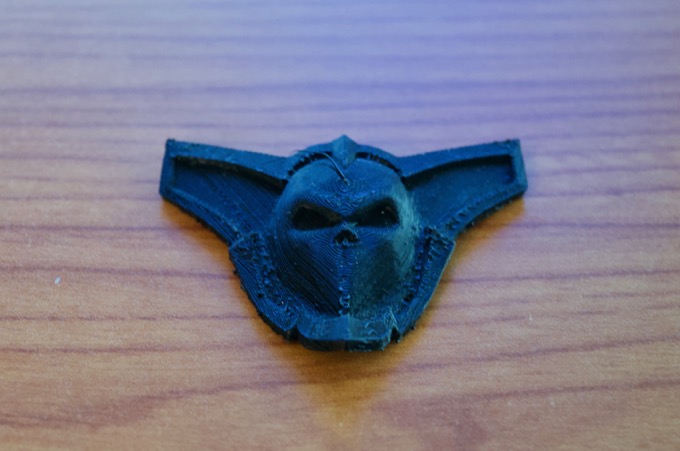
I'm not overly impressed with the results. I just hope that with some spit and polish I can make it look better. It doesn't have to be perfect. After all, it'll probably be mostly obscured by the belt.
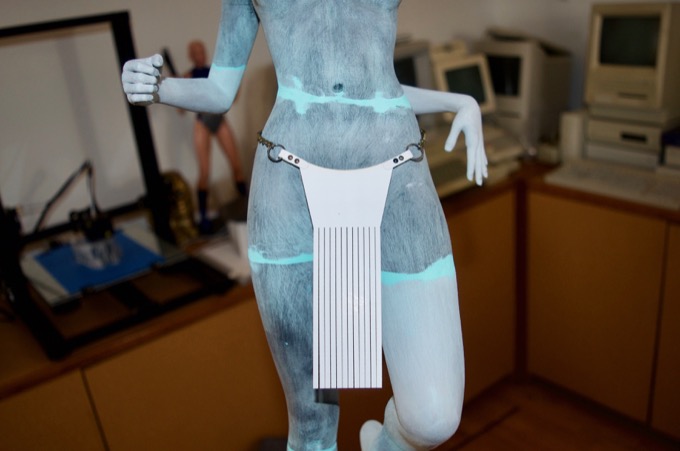
I started by cutting some thin strips out of poster board and added the hardware.
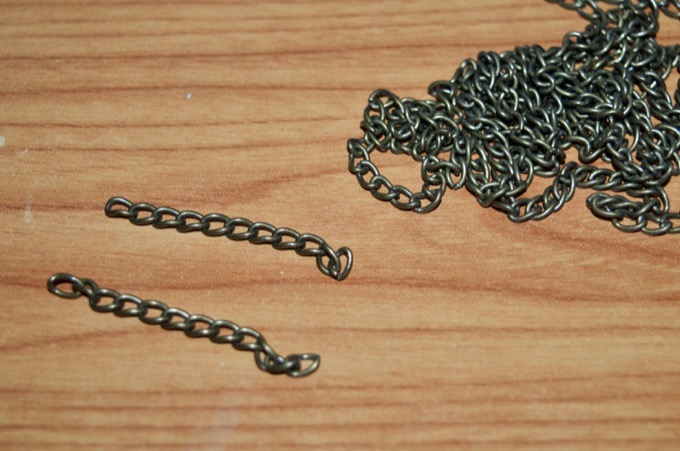
I then cut some chain to length.
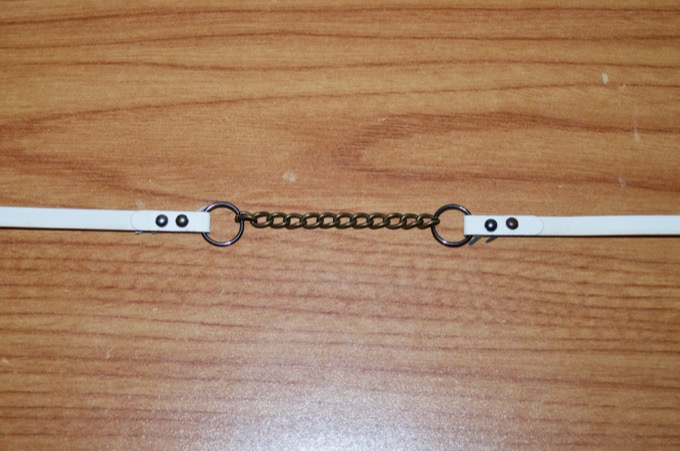
Finally, I attached the chains to each end.
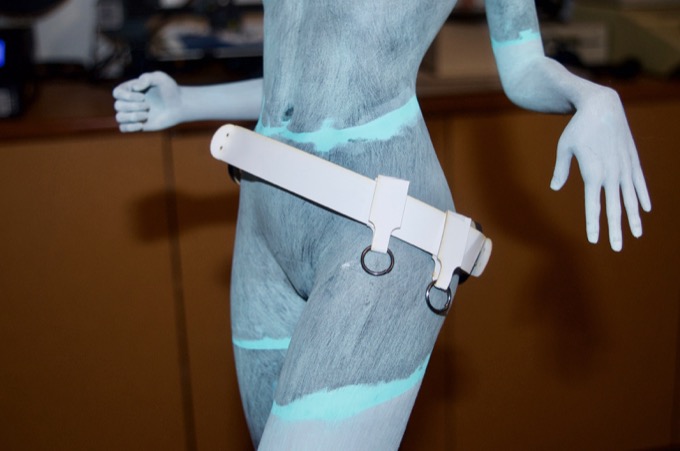
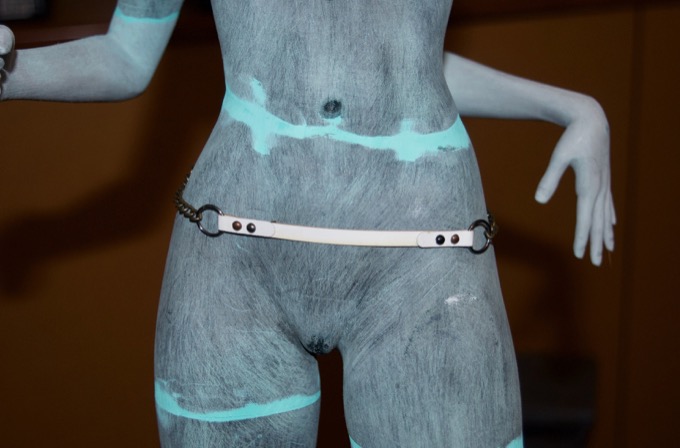
In the end, I'll have some leather hanging off the front here so that I can secure the face plate to it. For now I just need to nail down the length of the belt.
That looks really cool. It is so much fun designing these parts.
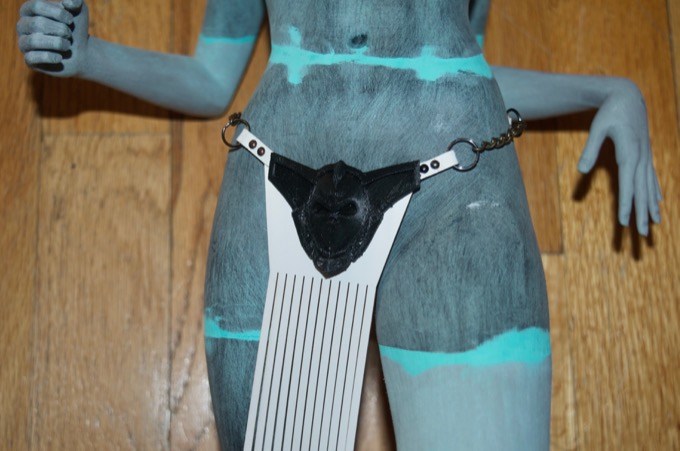
With the dimensions for the belt nailed down, I then expanded on the design.
I cut the piece out and gave it a test fit. That looks really good. The final version will be cut out of leather so hopefully the tassels hang nicely.
I’ll then glue the faceplate to the leather.
The 3D model had the thong modeled into the belt with the faceplate and the loin cloth. I wanted to make them separate pieces. I thought about making it out of fabric.
I had some leather cord so I cut it to length to act as a strap. I then cut a piece out of an old undershirt.
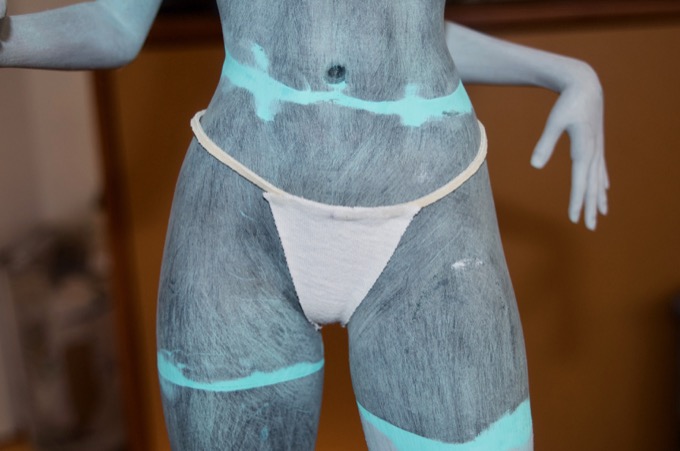
I super glued the fabric to the strap and installed some metal loops to the back to clip it all together. It looks OK, but I don’t like the way the fabric wants to keep curling. It looks kind of sloppy.
I think it’s going to have to be laser cut out of some thin leather. (Thinner than the leather I’m using for the belts and straps.)
I used the same leather cord for the strap but laser cut the main piece out of poster board for a test fit.
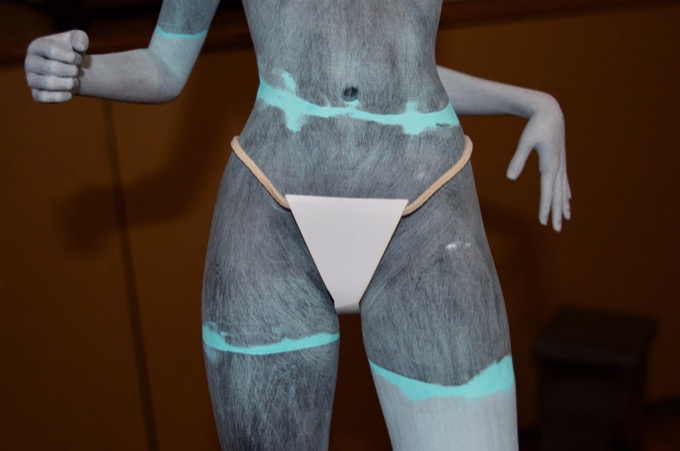
I think that’s much better. It’ll hold its shape better and won’t tear when the hardware on the back is installed.
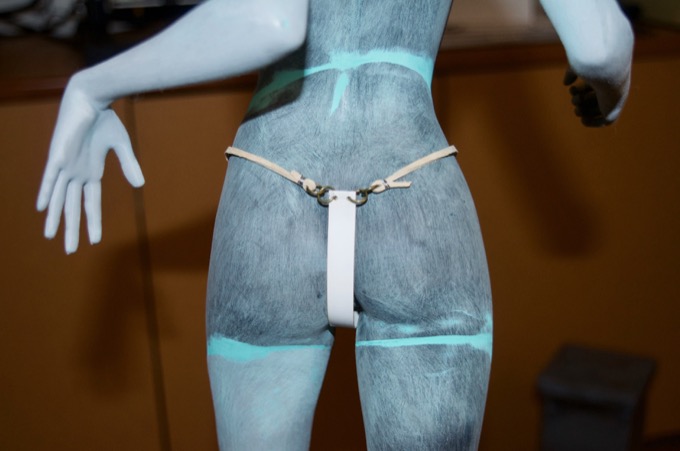
I then put all the pieces on to get a feel for how it's going to look.
It's looking great. It’s going to look amazing when it’s all cut out of leather and weathered.
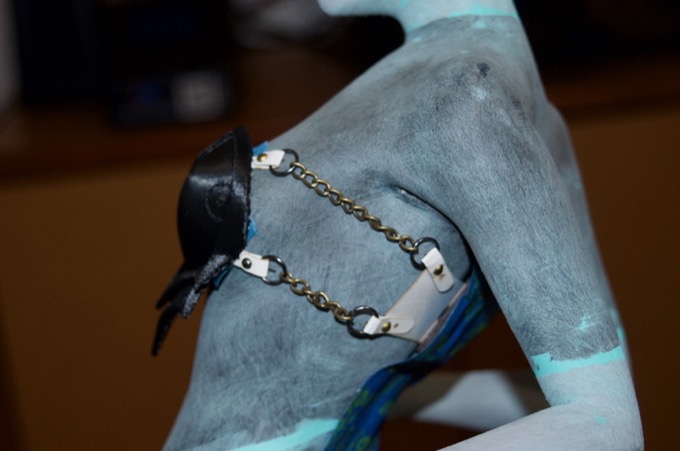
The next piece to work on was the back straps for the breastplate. I basically used the same design elements as the main belt.
The chains will connect to the sides of the breastplate. I’ll have to glue the straps to the backside of the breastplate so the chains have something to connect to but I won’t be able to do that until it’s all sanded and painted.
Time for some sanding and painting. I rounded off all the edges on all the wooden pieces and gave them a coat of primer and then some glossy gray.
I then gave them the graphite treatment. They look so much better in person. You'd never know they were made out of wood.
I made this little jig in order to bed a piece of acrylic into shape for the belt prong.
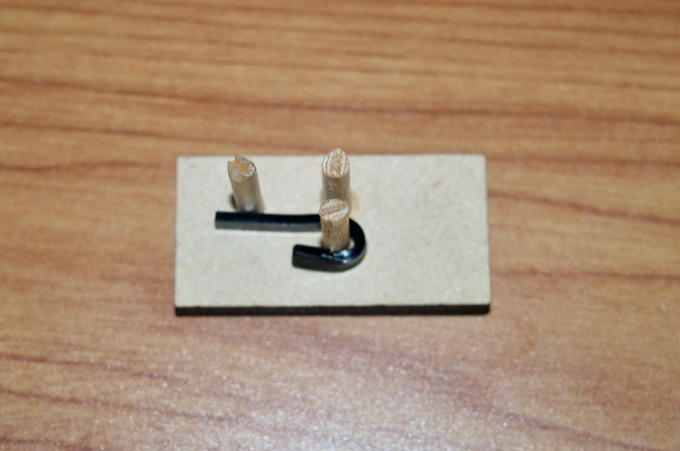
It works, but I'm not sure I am happy with the results. The print does look a little melted. I may have to revisit this.
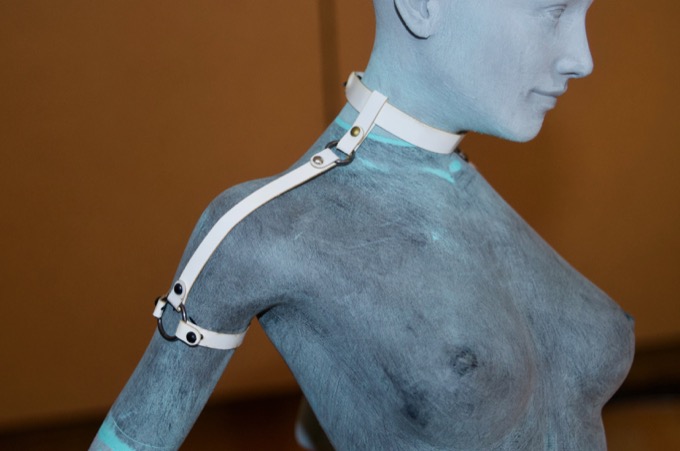
I then moved onto the shoulder harness. This part was a little tricky and it took some time to get all the lengths of the strips just right.
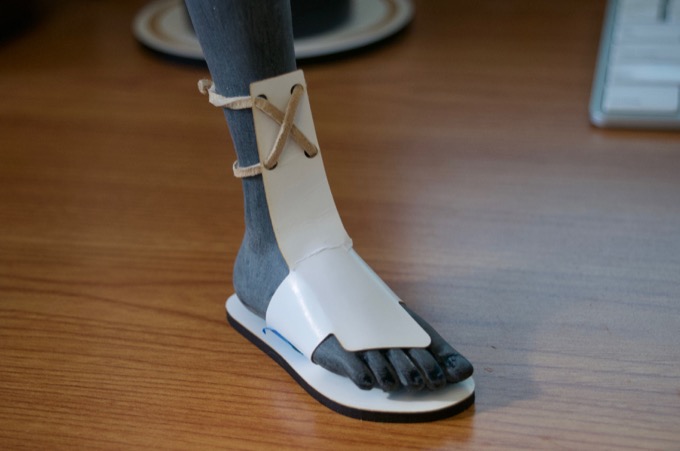
I think the last part to work on for now are the shoes. These are tricky. They have to be something that I can slip on the feet and not have to build around them. I played around with a few designs but ultimately settled on a simple leather slip on shoe. I can then lace it up and tie it at the back of the legs
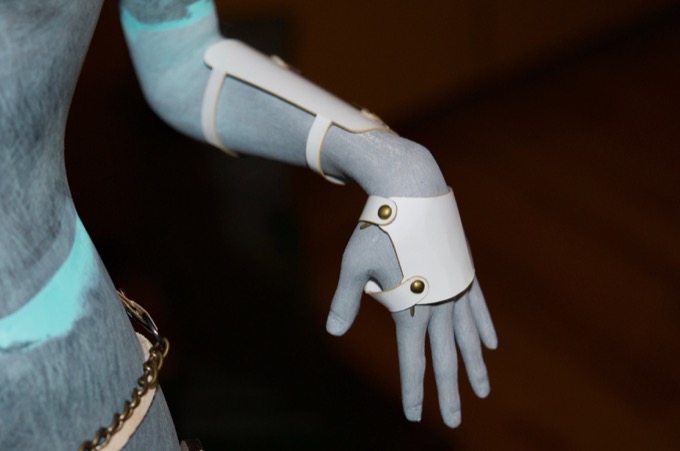
I then made the gloves and the bracers. They came out pretty cool.
These parts were so much fun to design. I can't wait to cut them all out of leather. However, I'm going to wait until all the parts are finished just in case something else needs a tweak along the way. I might install some eyelets into some of the pieces, so I might have to go back and tweak some of the hole sizes. I also want to engrave some patterns onto some of the pieces so I'll have to go back and incorporate them into the design.
See this project from start to finish: 23" 3D-Printed Figurine - Part I 23" 3D-Printed Figurine - Part II 23" 3D-Printed Figurine - Part III 23" 3D-Printed Figurine - Part IV 23" 3D-Printed Figurine - Part V 23" 3D-Printed Figurine - Part VI 23" 3D-Printed Figurine - Part VII
23" 3D-Printed Figurine - Part VIII 23" 3D-Printed Figurine - Part IX 23" 3D-Printed Figurine - Part X 23" 3D-Printed Figurine - Part XI
