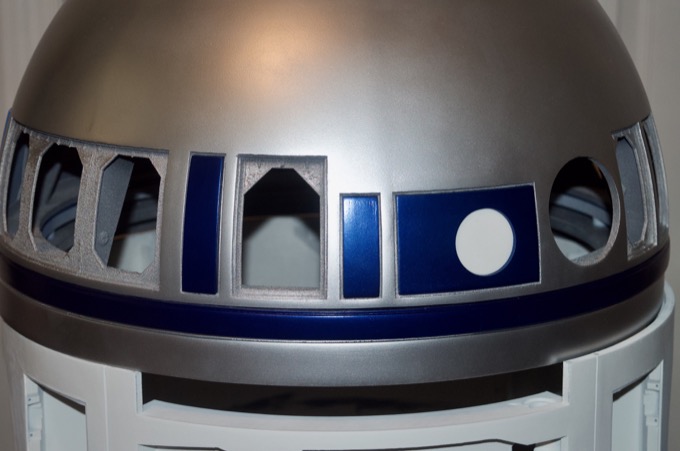
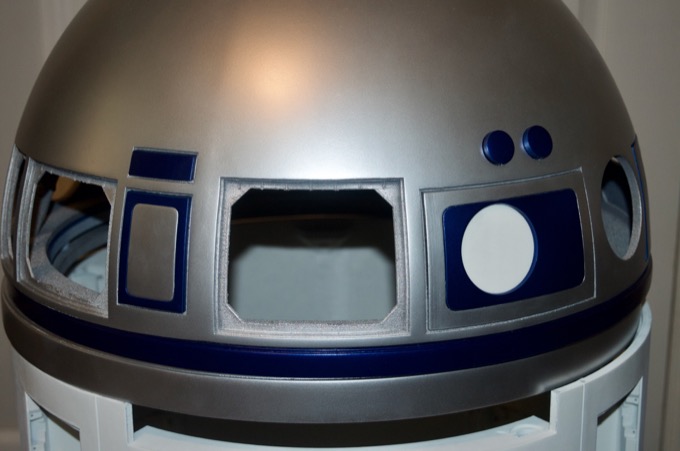
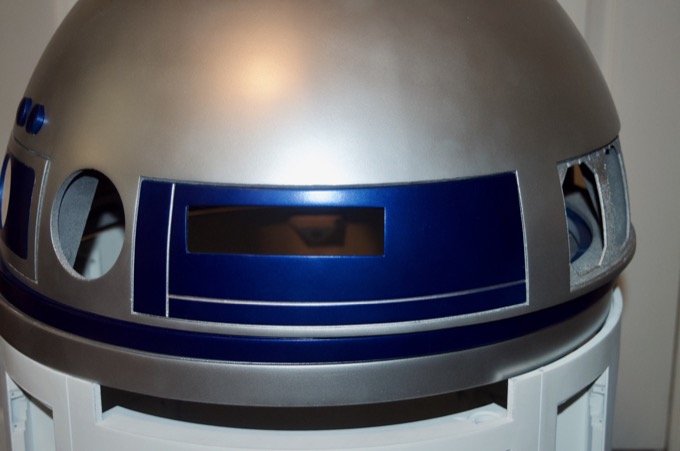
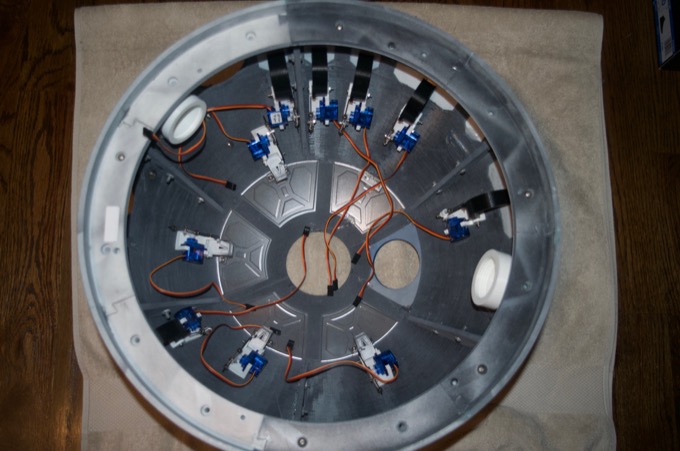
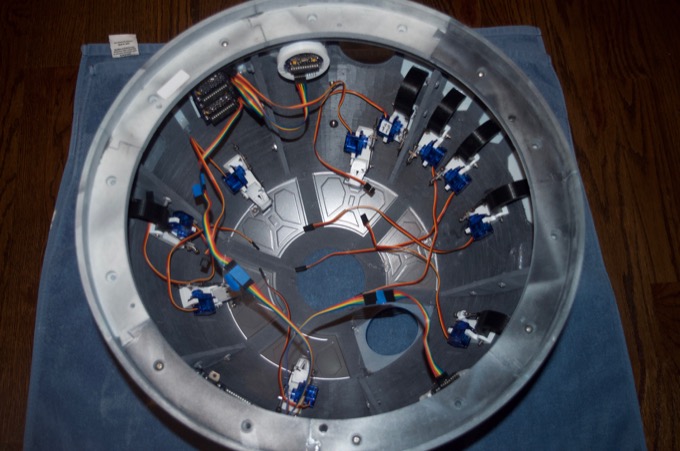
With all the greeblies printed and painted, it's time to glue them all into the dome. I started with the easy ones first; the ones that do not need any servos. I hot glued them into place. Hot glue is the best choice since it'll hold them in nicely, but it's easy to remove in case I want to make upgrades or repairs in the future.
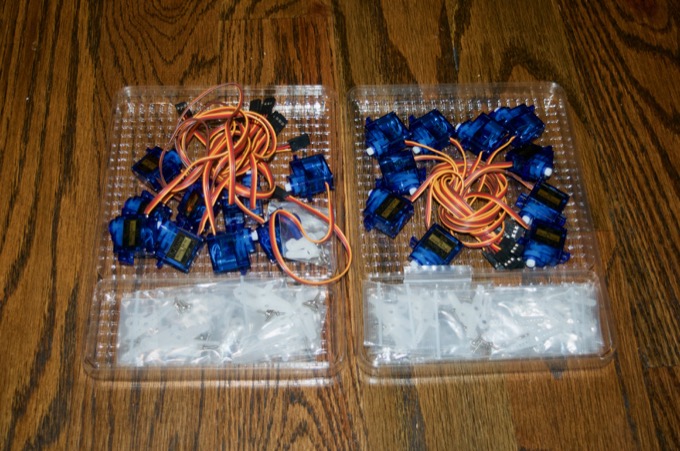
I picked up 20 9g servos that I'll use to open all the panels and move the holoprojectors.
I printed all the panel hinges and servo mounts that I needed.
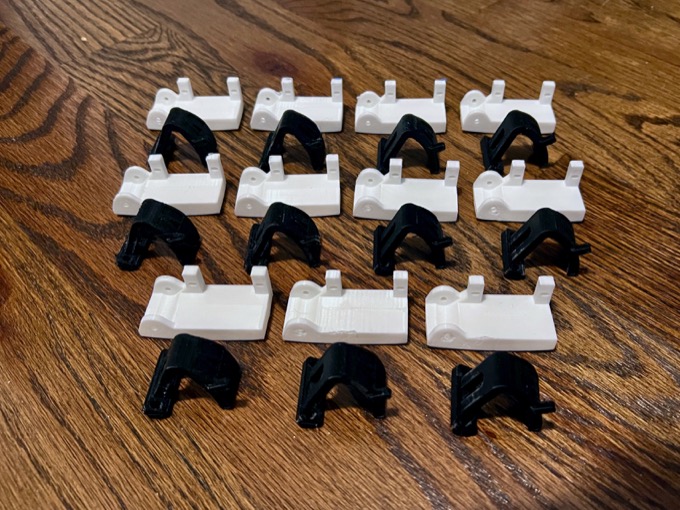
The only hinges that you will ever see are the ones for the five top pie panels. They are the only ones that I painted silver. Even though they will be visible, you'll hardly notice them while the panels are opening and closing. Therefore, I decided to do zero finishing on them. I can always upgrade them later if they turn out to be an eye-sore.
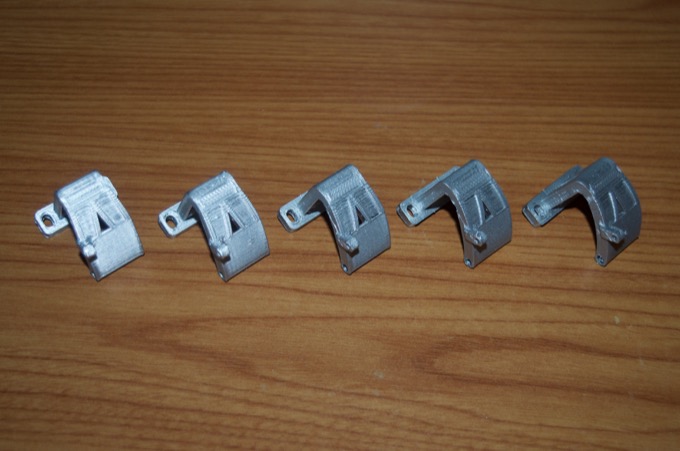
I realized after I started to assemble them and do a test fit that those hinges only work on the top pie panels. They do not work on the rest of the panels. I looked online and found another version on
Thingiverse. I modified the arms so that they would fit the mounts that I had already printed. I printed out new arms and I was back in business. It's not shown in the picture here, but after test-fitting them I realized that one did have to be reprinted inverted in order to fit.
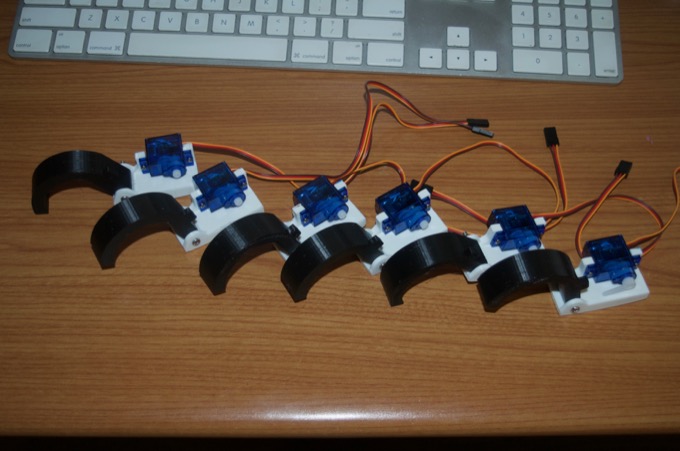
I picked up some additional hardware to make some servo savers and assembled them.
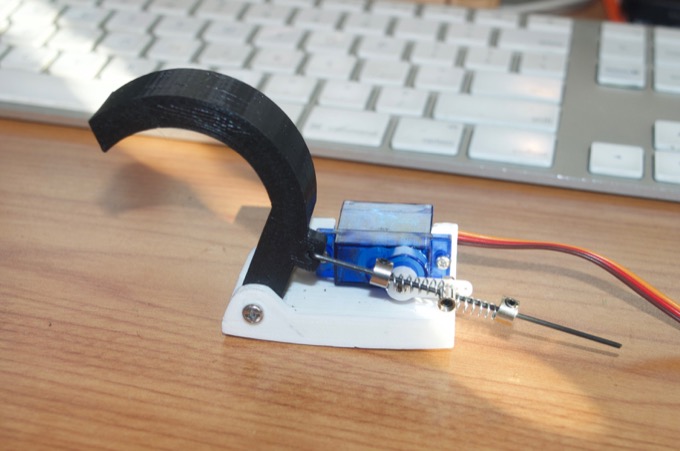
Once they were all assembled, I glued them into the dome.
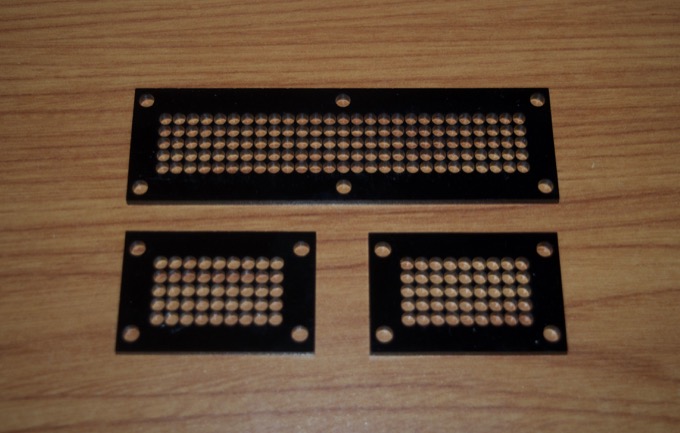
With all the panels secured and the servos in place, it was time to work on the lights. I thought assembling the TEECES lights would be an "afternoon project". I didn't realize how time consuming it was going to be to individually solder 277 LEDs, in addition to the rest of the components. Not to mention, the LEDs that I had for the data ports are not flangeless. The LED spacing is so tight that LEDs with flanges do not fit side-by-side. I had to take a pair of flush cutters and snip the flanges off all 225 LEDs. I pretty much spent all weekend putting them together!
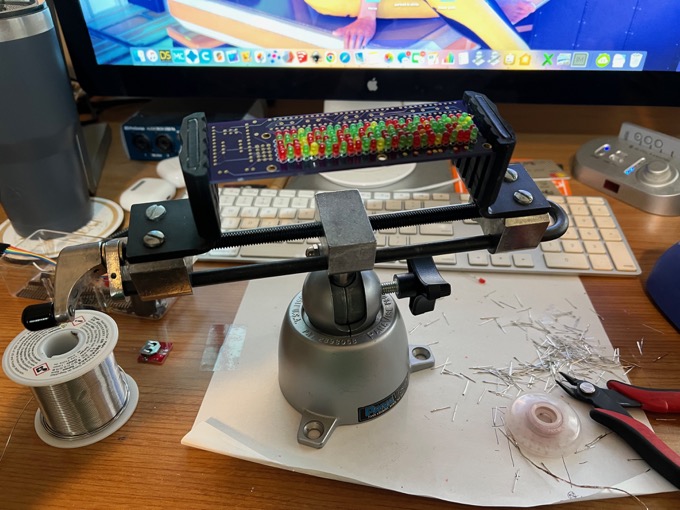
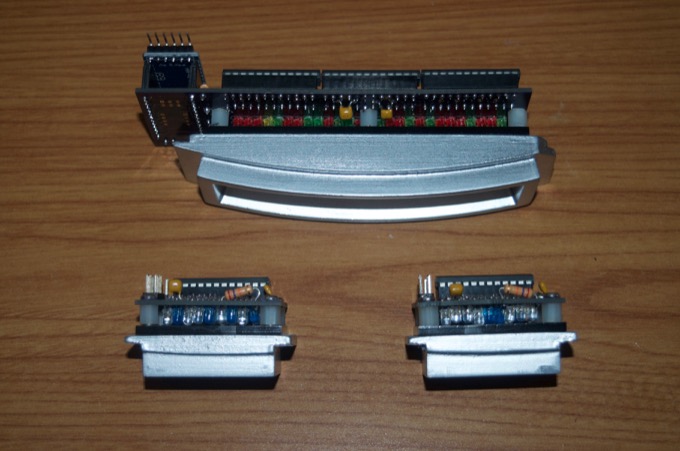
In the end, it was well worth it to take my time and do it right. There were no issues, no troubleshooting, no faulty LEDs. I assembled them, uploaded the sketch, and they just worked. They came out amazing.
The LED bezels in Mr. Baddeley's files do not fit the TEECES lights so I had to make my own. I could have designed them from scratch, but it would have required a few iterations to get it just right and I didn't want to spend the time and waste acrylic prototyping them. I looked online to see if someone had already designed a bezel for them and luckily I found one on
Thingiverse.
I brought the 3D model into SketchUp so that I could isolate the faces. I then exported them as SVGs so that I could laser cut them.
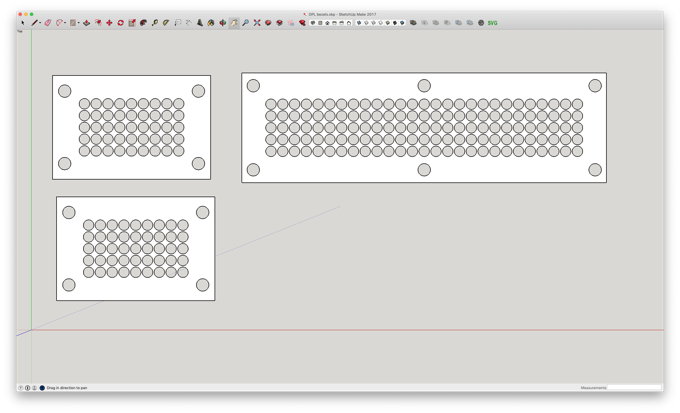
They came out pretty nice.
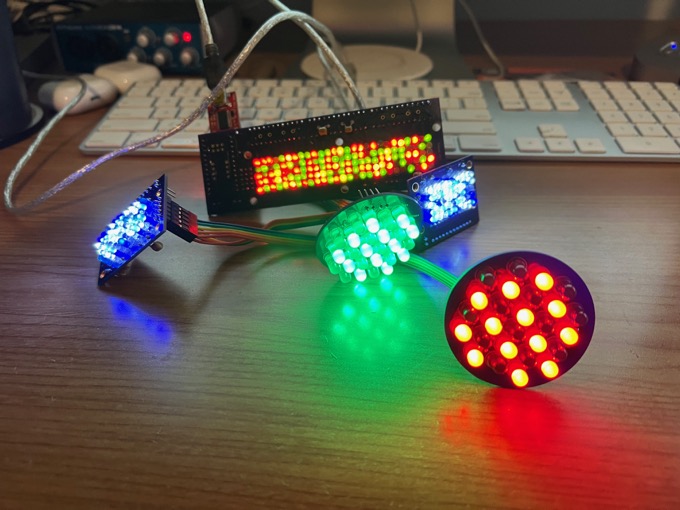
I then attached the bezels and the data port frames to the lights.
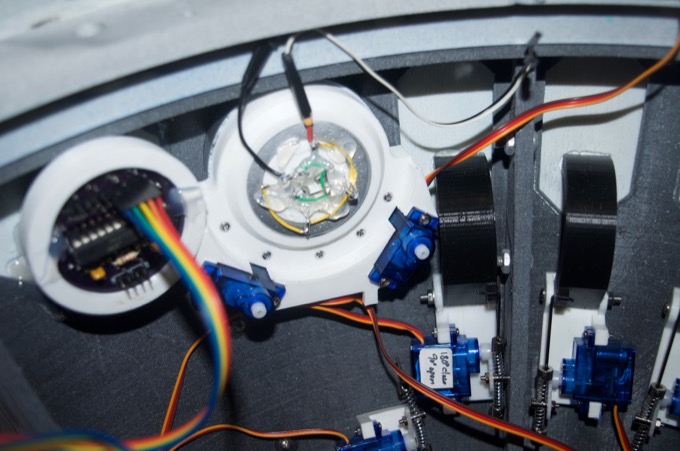
I then installed them into the dome. The wiring is a mess but it's temporary for now until I install the Arduinos that will control everything.
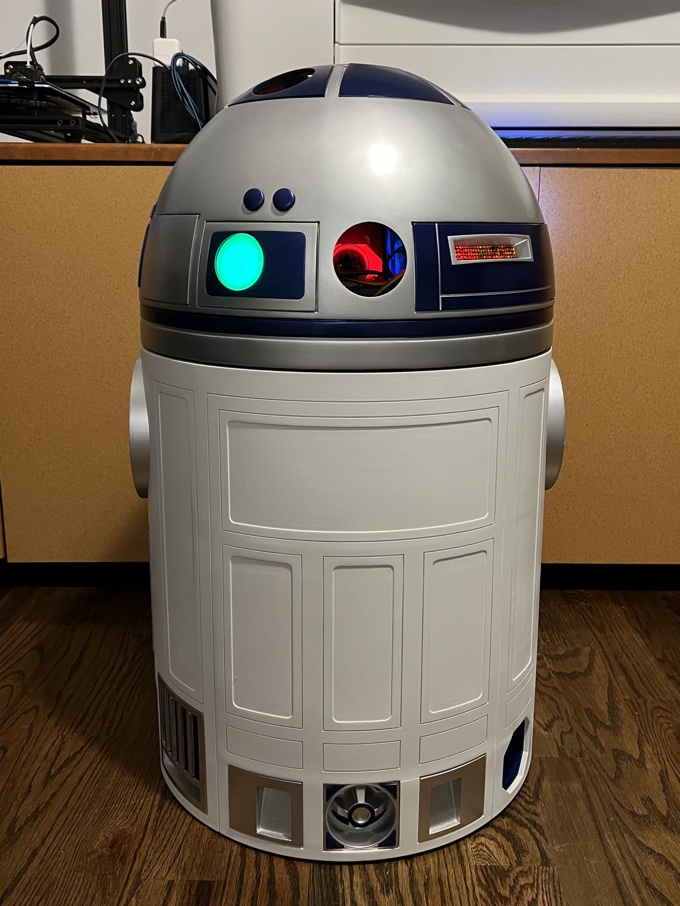
Once I had them installed I connected the power just to see how well the PSIs looked behind the holders that I printed with 100% infill. I think they look great and won't need any further modifications.

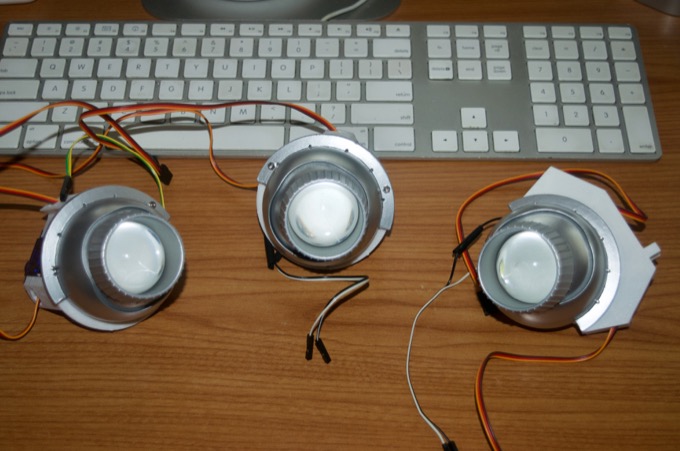
The last part of the dome to complete are the holoprojectors. I put them together and installed the servos.

I then soldered in the LEDs.
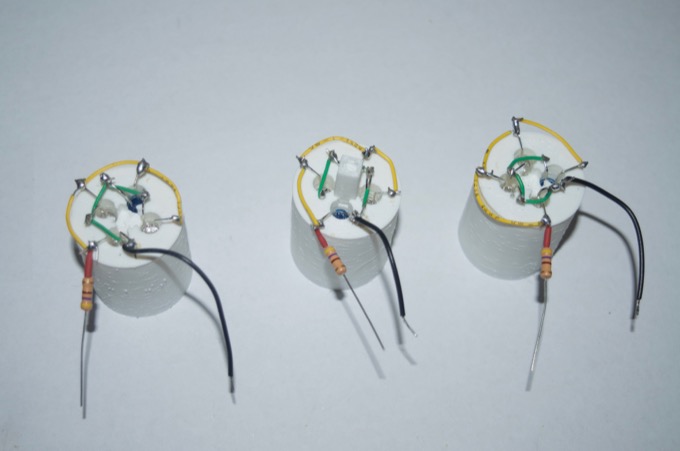
The last thing to do is to print the servos arms. They need to be printed in TPU and since the printer is tied up right now with some other parts I'll print them later. So I don't have to keep swapping rolls, I'll probably print them when I print the tires since those are printed in TPU too.
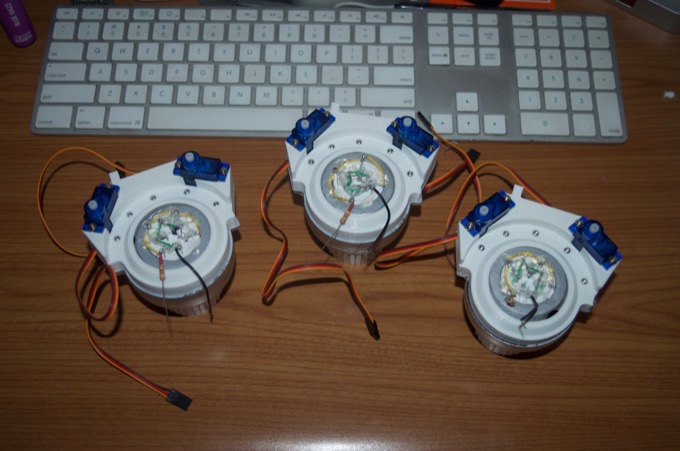
It was at this point that I did a test fit and realized that Mr. Baddeley's holoprojector mounts are just for the top holoprojector. There's no way the ones on the sides are going to fit.
On one, a panel hinge and a TEECES light are in the way.
On the other, it doesn't even reach the hole since the TEECES light and a dome panel seam are in the way.

It looks like it's back to the drawing board on two of these. I looked online again for an alternate mount and
found one.
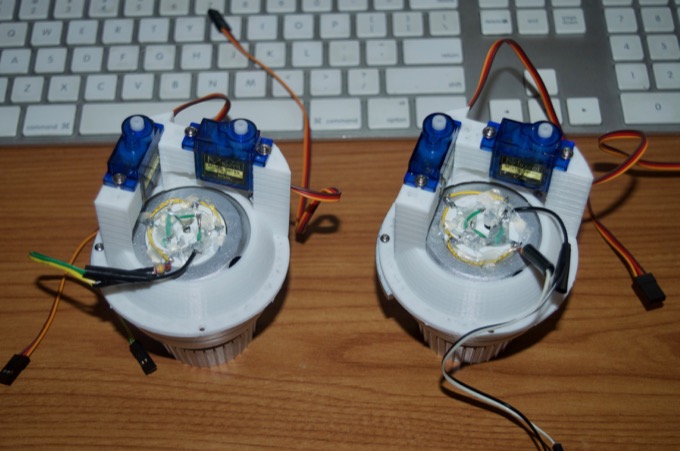
The acrylic cabochons for them were pretty expensive. Although they are only $3.15 each, TAP Plastics is pretty much the only game in town when it comes to finding the perfect size that fits Mr. Baddeley's design. They charged almost $12 in shipping, so the total came out to just over $21 bucks for them. Yikes!
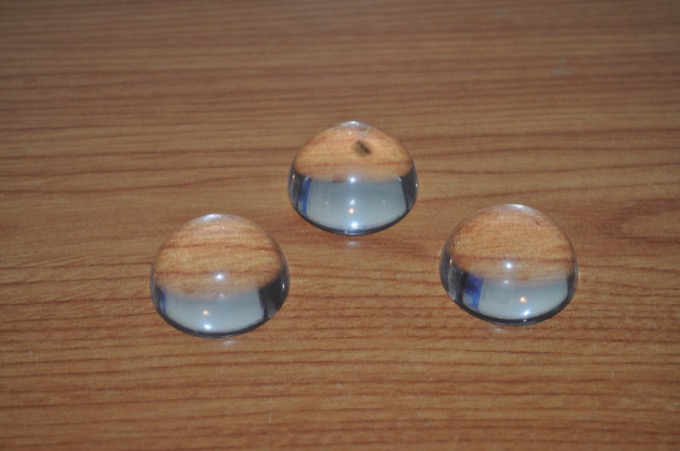
They do look pretty sweet and it's far better than just popping in a flat piece of acrylic.
I can't believe how long it took to complete these. They have been holding up the completion of the dome for weeks. I still have to print the servo arms in flexible TPU, but without working electronics just yet, I can save that for a rainy day. For now I am going to call them done and glue them in later when the servo arms are printed.
See this project from start to finish:
3D-Printed R2-D2 - Part I - Dome 3D-Printed R2-D2 - Part II - Body 3D-Printed R2-D2 - Part III - Skirt 3D-Printed R2-D2 - Part IV - Body Assembly 3D-Printed R2-D2 - Part V - Body and Dome Finishing 3D-Printed R2-D2 - Part VI - Body and Dome Greeblies 3D-Printed R2-D2 - Part VII - Final Dome Assembly
3D-Printed R2-D2 - Part VIII - Legs and Feet
