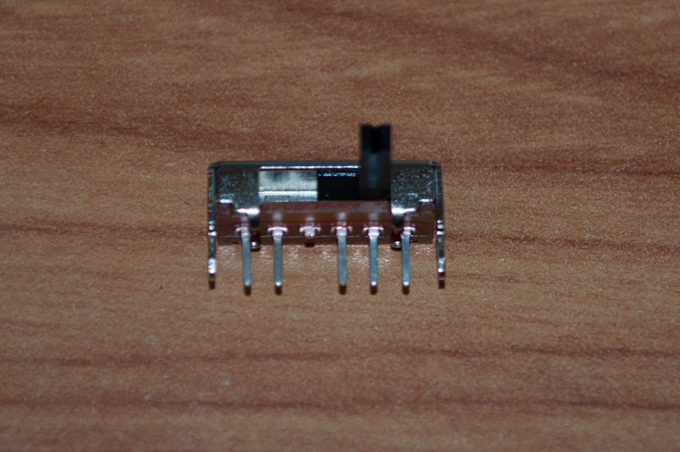
There's one last feature that I want to incorporate into the IN-18 nixie clock before I order the PCBs. I want to put in some sort of switch that I can use to cycle the color of the RGB LEDs. I found this cool little 4-way slide switch from Digi-Key. It should do the trick. I want to be able to toggle between red, green, blue, and some kind of auto mode. Maybe fade from one color to the other throughout the day.
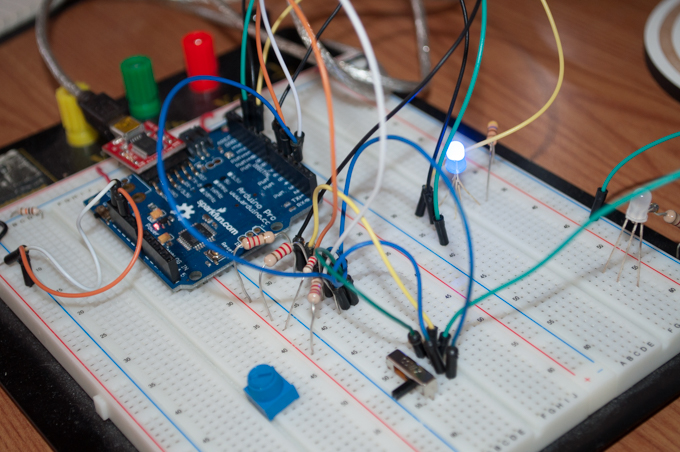
I first needed to figure out the pinouts. From the datasheet, it wasn't immediately obvious as to how one would hook this thing up. I managed to breadboard it and figure out how to read each of the four positions and turn on the RGB LED in sequence.
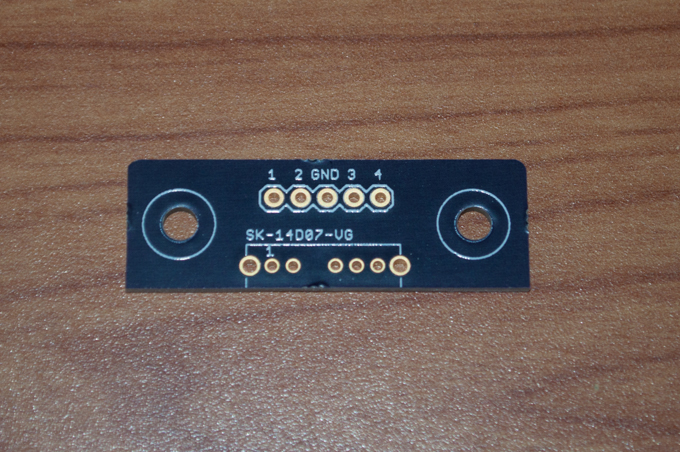
I then designed a little breakout board for it.
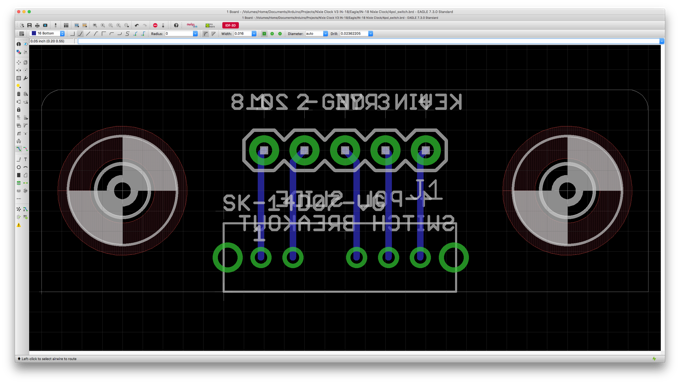
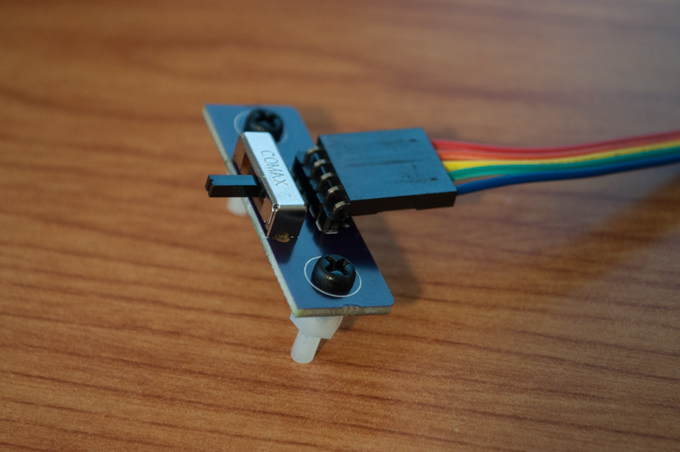
That should do the trick. I'll just mount it on the back of the clock case and connect it to the mainboard with a 5-pin ribbon cable.
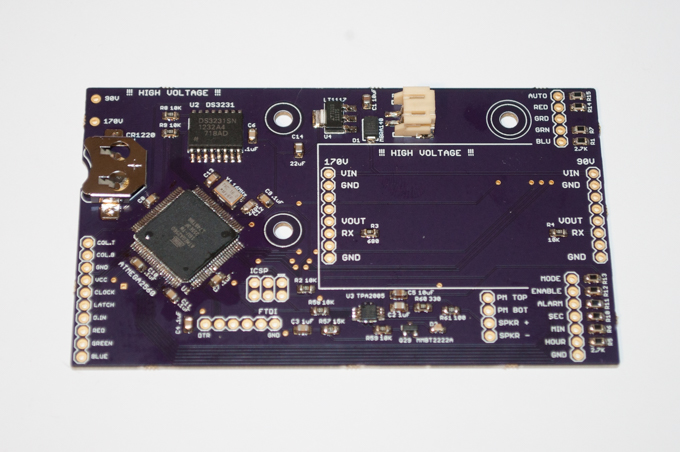
I then incorporated a 5-pin header on the top right of the PCB that I can connect the 4-way switch to.
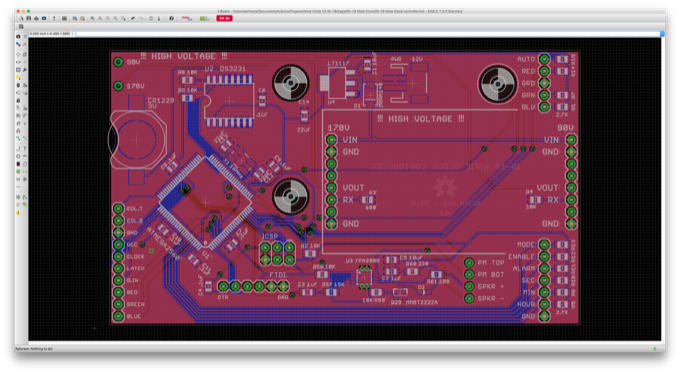
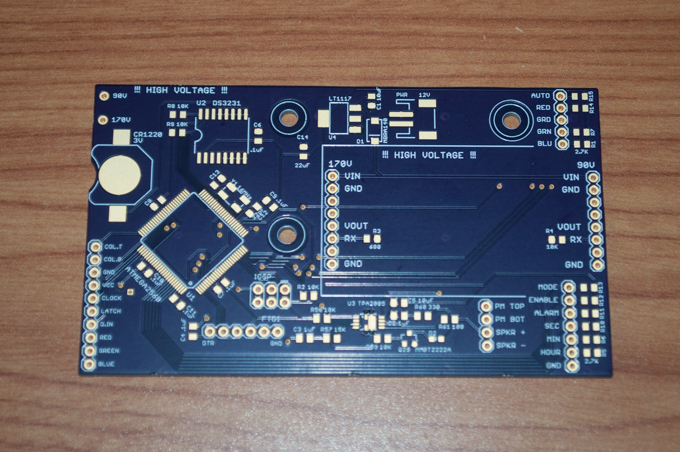
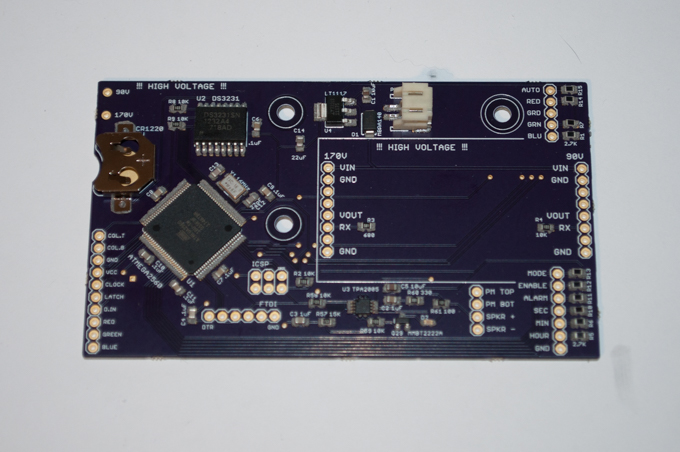
I opted for the Super Swift service and had my boards back from OSH Park in just a few days. They look awesome.
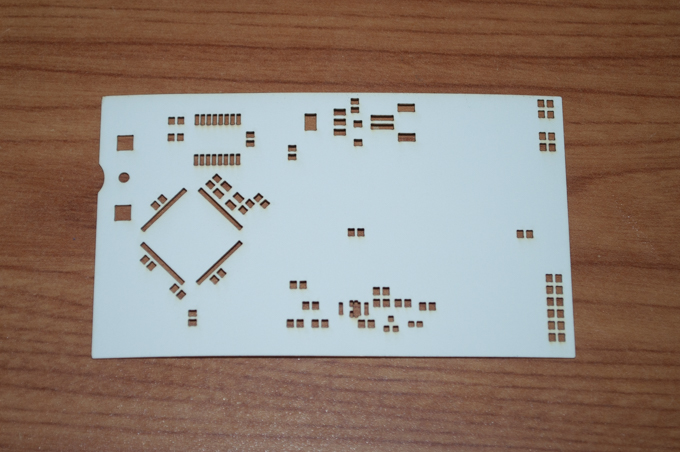
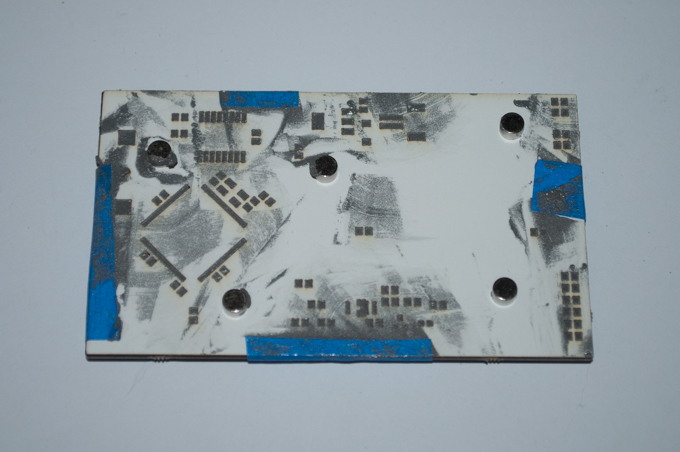
I exported the top cream layer to an SVG and cut it out of a piece of poster-board with my Glowforge.
Not too shabby.
I made the openings over the ATmega2560 half the width of the pins, but I have a funny feeling it's still too big. I couldn't make the holes for the pads small enough for the solder paste to adhere to the pads. Any bigger and the laser just made one big opening. I opted to just make a slit in the poster-board along the pads. I hope it does the trick.
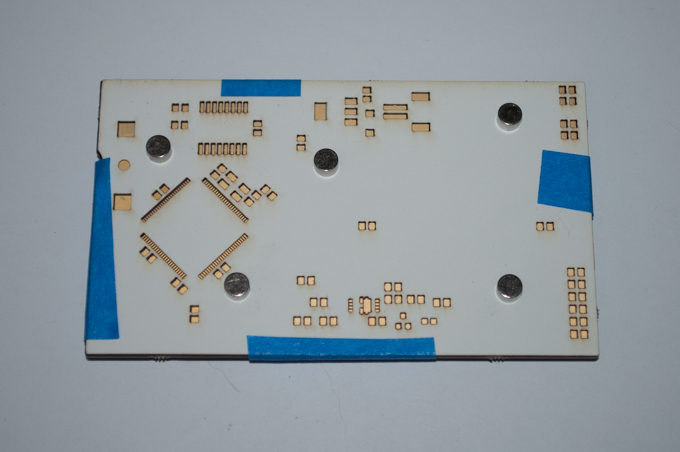
I then placed my components. I just hope that when it goes in the oven the solder goes to where it needs to go and the solder on the ATmega2560 doesn't just turn into a giant blob.
Sure enough, everything came out great, except for the ATmega2560. There were spots on all four sides that I had to clean up with some copper braid. It took a lot of flux and patience, but it worked out OK. I should have just soldered it by hand. It's so much easier to just drag-solder the pins.
I then soldered in all the headers and connected the two high voltage nixie power supplies. I attached them with headers so that if one ever blows, it'll be easy to just swap it out with a new one.
I uploaded my sketch, crossed my fingers, and applied power. Woo hoo! It's a clock! The controller works. I'm so glad I didn't cook the ATmega2560 with all the cleanup I had to do to the pins.
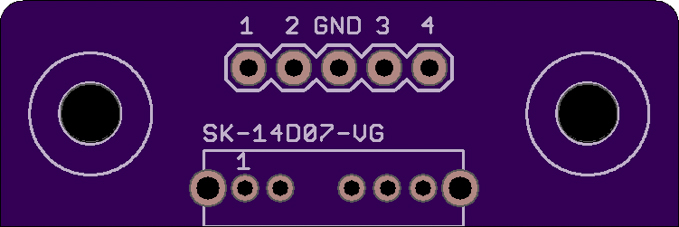
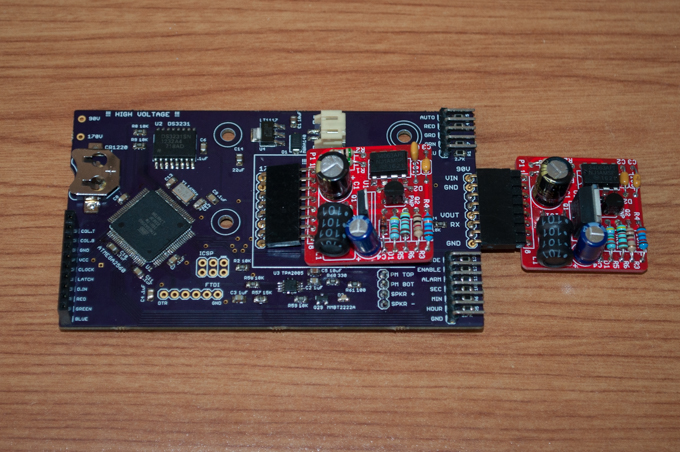
I then put together my little 4-way slide switch breakout board.
The good thing about this switch is that the slider is 6mm tall. So if I make the case out of 3mm thick wood or acrylic, the slider should still stick out about 3mm.
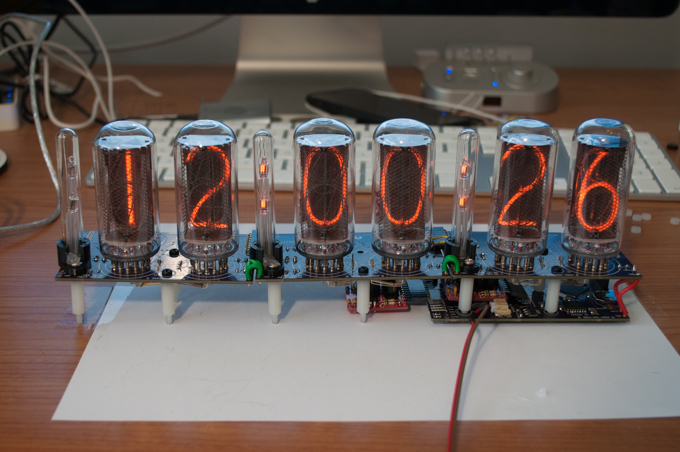
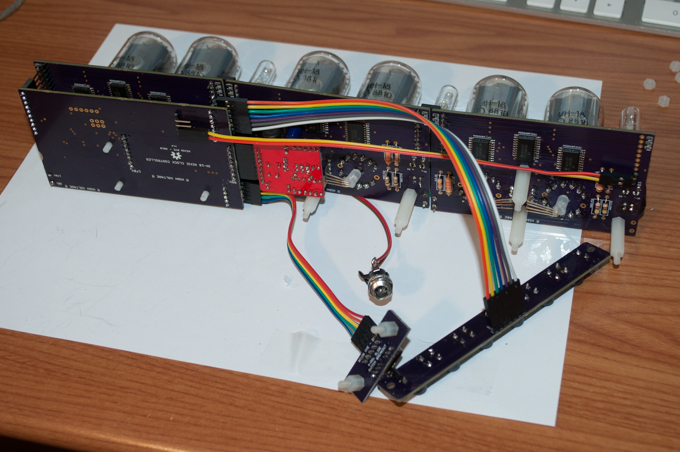
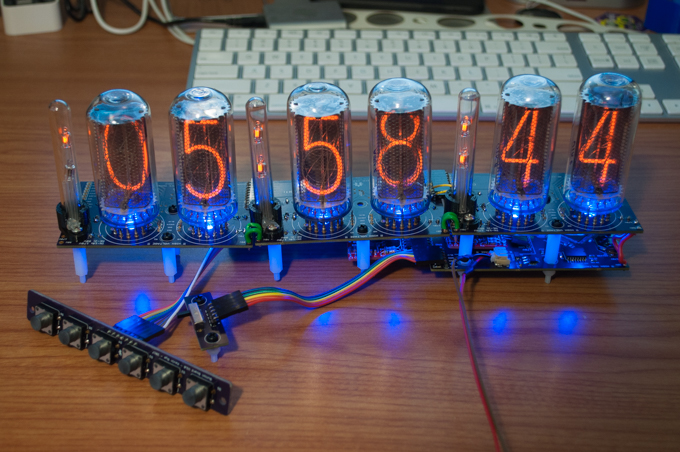
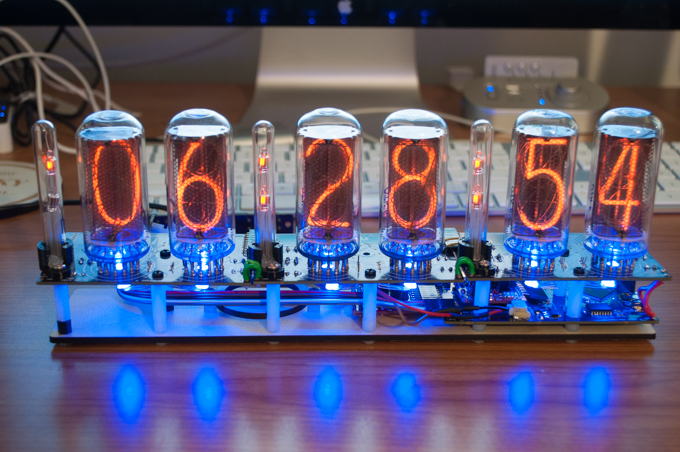
I connected the 4-way switch, my 6-button board, and the PM and alarm indicators.
I made a few tweaks to the code for the buttons and the PM and alarm indicators and it was good to go. All that remains is to put in the code for the audio stuff, connect a speaker, and make a case.
In the meantime, just to help firm things up and keep it all together, I made a simple board that I can screw it all onto to keep it all together.
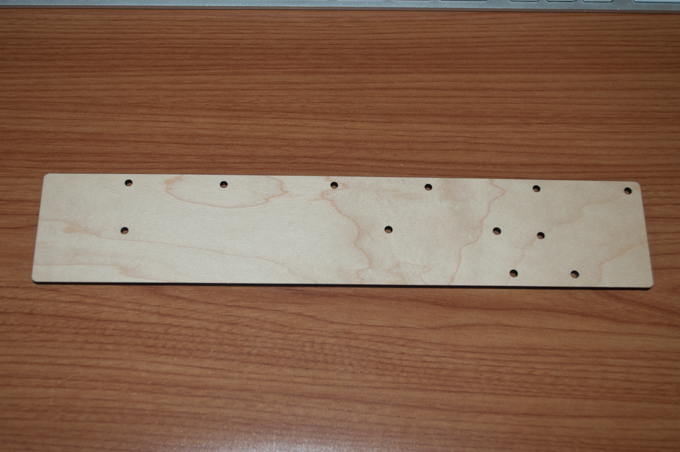
That'l do the job until I can make a case for it.
 See this project from start to finish:
IN-18 Nixies TPIC6B595 Shift Registers IN-18 Nixie Clock - Part I NE-2 Neon Bulbs IN-18 Nixie Clock - Part II IN-18 Nixie Clock - Part III IN-18 Nixie Clock - Part IV
IN-18 Nixie Clock - Part V
