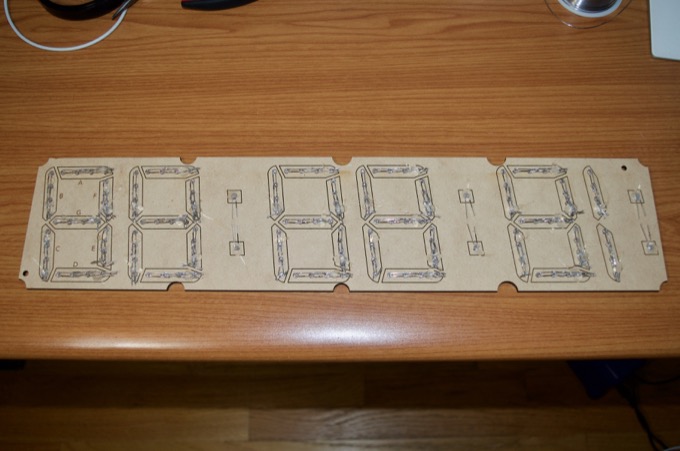
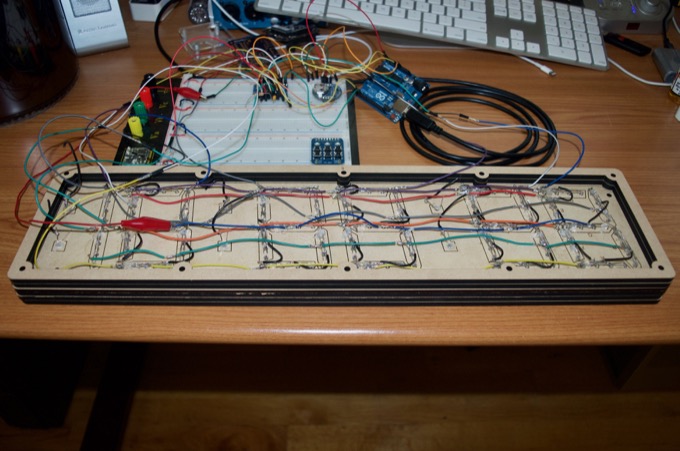
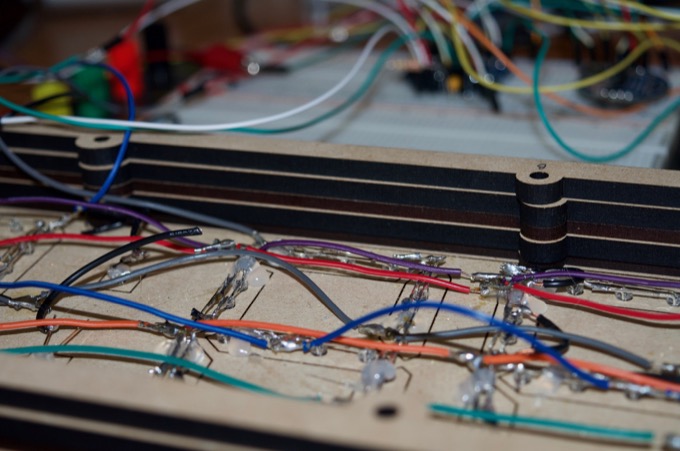
With the first panel cut, I got to work on soldering in all 154 LEDs.
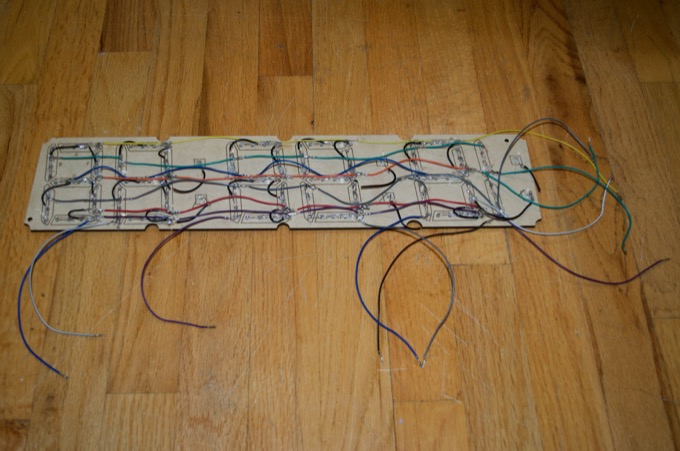
I then connected all the segments and made all the ground connections. I have to admit, this was so much harder than I thought it was going to be. I though I'd bang this out in a single afternoon, but it took three sessions of several hours each to solder all the LEDs and the connections. What a pain it was.
I then connected all the digits and segments to a MAX7219 breakout board.
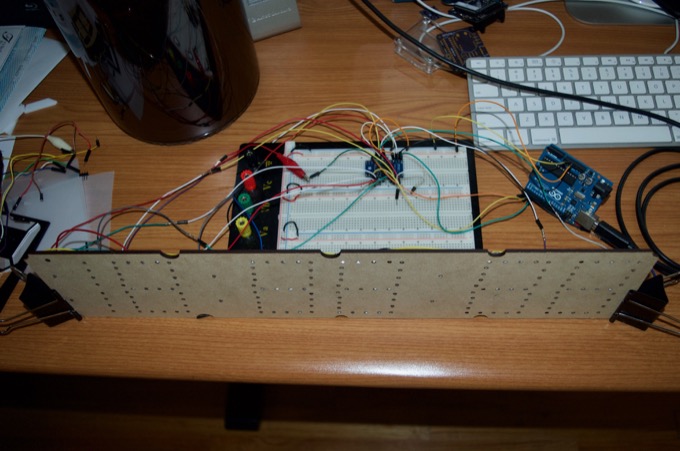
I took me a few days to figure out this chip but I managed to put together some Arduino code to get it to display data. It's amazing that the MAX7219 can drive 8 digits simultaneously. What an awesome little chip!
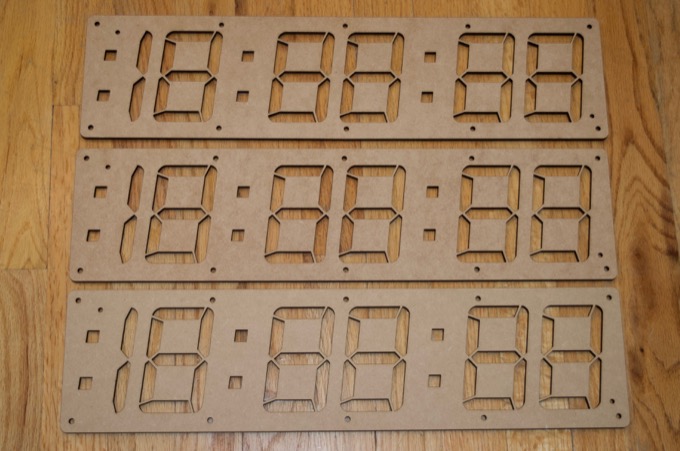
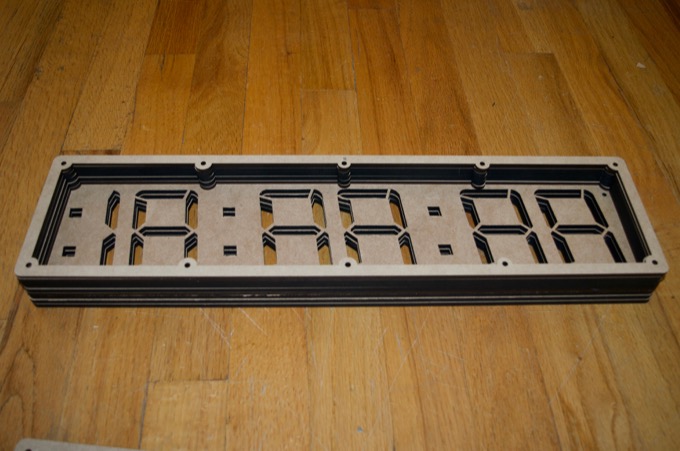
Getting the MAX7219 to work gave me the green light to move on with the enclosure. The next step was to cut out the baffles for the LEDs. My prototype display showed that they need to be 3/4" tall, so I cut out three panels from 1/4" Draftboard. I had to order more sheets from Glowforge. It took two weeks for them to arrive!
I then cut some additional pieces for the back to leave some room for the wires and the PCB. This is when it occurred to me that I would need some additional height to accommodate the push buttons that are going to be on the back of the case. I thought about putting them on top of the clock, but the two digits in the middle will get in the way. Having them on the back will also make for a cleaner looking enclosure.
An inch should be more than enough room to accommodate the push buttons, all the wires, and the PCB.
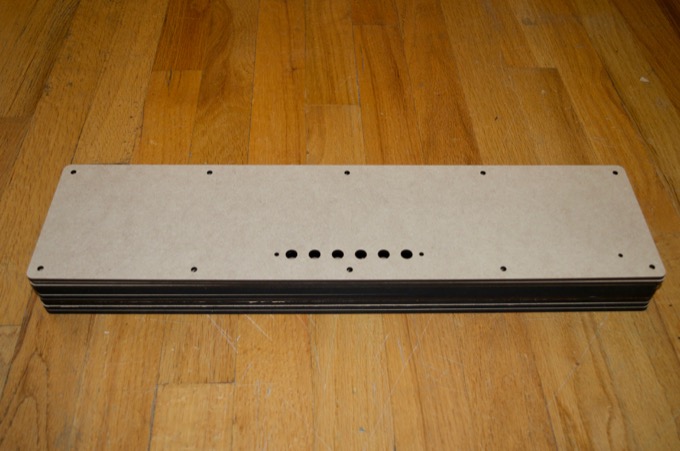
That's a lot of panels. It's going to be super tricky gluing them all together and keeping them lined up perfectly. Once it's glued together I'm going to have to Bondo the sides and sand them all smooth in order to get rid of the seams. I would like to keep the sanding to a minimum if I can.
I'll then glue in some threaded inserts into the holes and secure the back with screws.
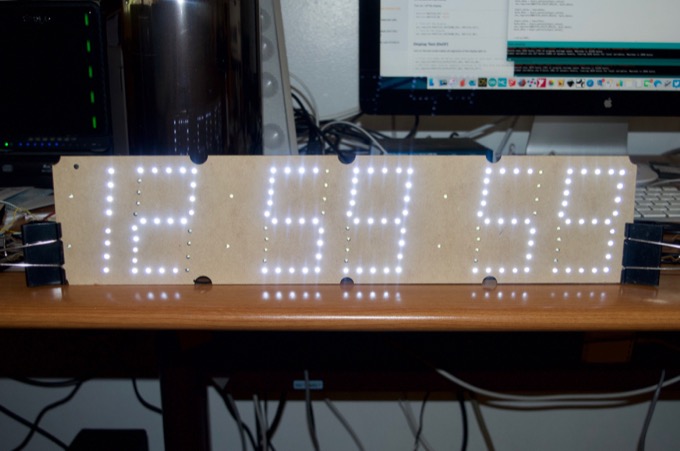
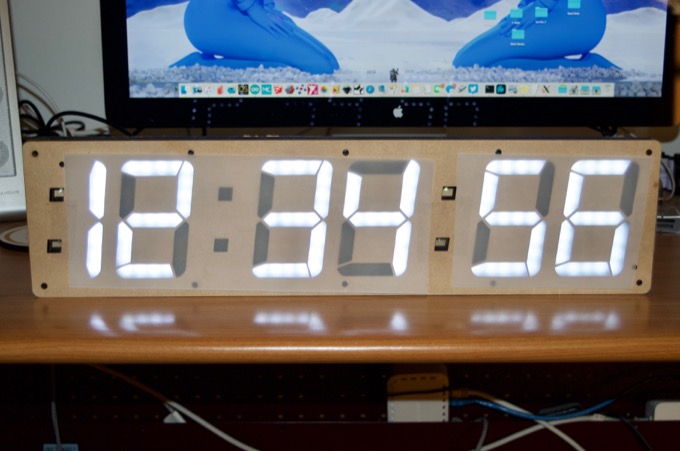
As a quick test, I popped the LED panel into the back and taped a single sheet of vellum over the front just to see how it looked. It looks pretty good. I think this just might work!
Unfortunately, I was right. It was super-tricky gluing all the panels together so that they lined up perfectly. I made a mess of it. Glowforge is out of stock of 1/4" Draftbaord so I'm going to have to wait until it comes back into stock before I can proceed with the build.
See this project from start to finish: Clock with DIY 7-Segment Display - Part I Clock with DIY 7-Segment Display - Part II
Clock with DIY 7-Segment Display - Part III
