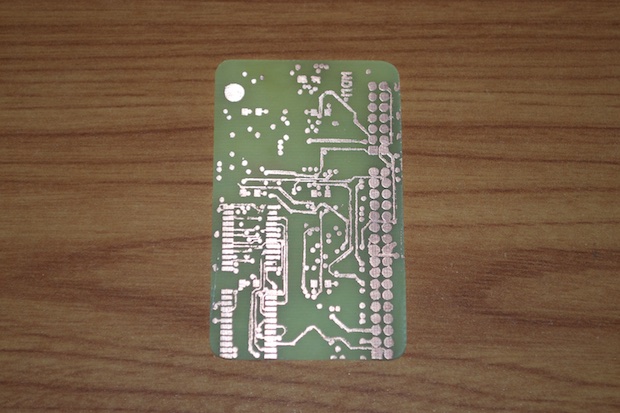
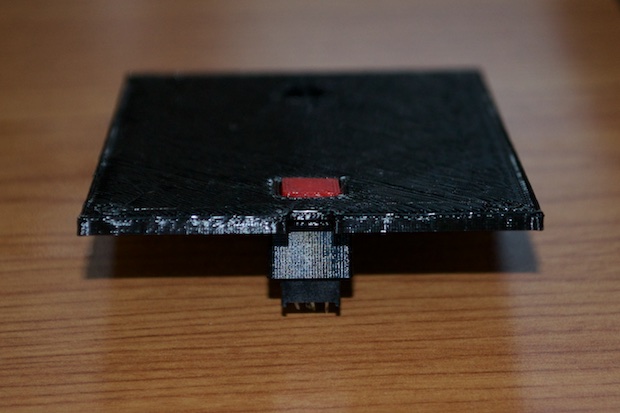
I last left off with needing to create the “Zorg Door Bomb” Clock killkey. In the movie, Zorg slides a small PCB into the top of the bomb to deactivate it. My clock has the same functionally. In order to stop the timer, or turn off the alarm, a killkey has to be inserted into the top of the clock.
Using some reference images from the movie, I got to work on making the PCB.
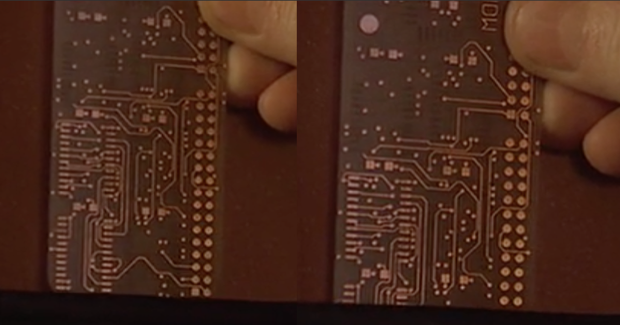
I did my best to make it as close to the original as possible, without taking things too seriously. I think it looks pretty good.
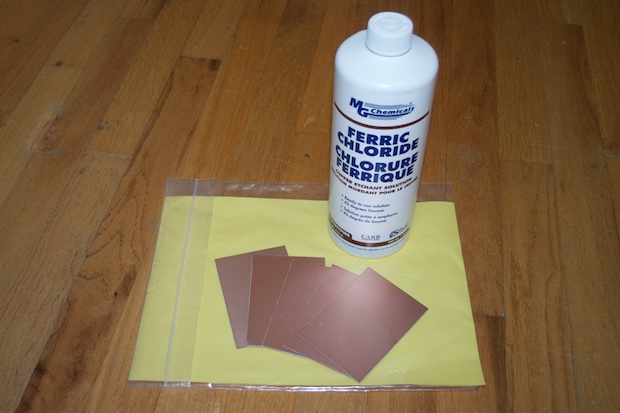
I picked up some toner transfer paper, some copper PCBs, and some etchant solution.
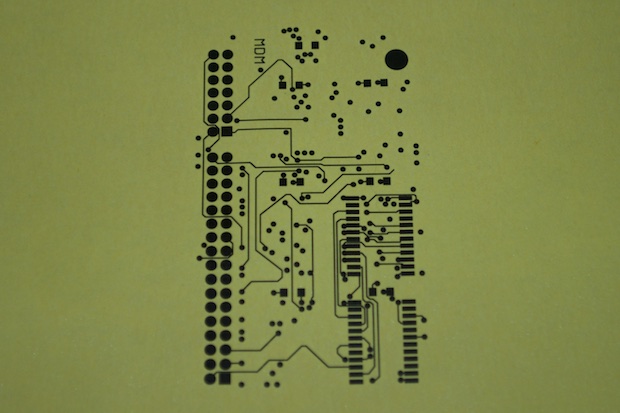
I first printed out the PCB onto the transfer paper, remembering to flip the image and hide the border.
I then secured the paper to the board with some tape, and applied a hot iron for a few minutes. There were no instructions with the paper, so I had no idea how long to hold down the iron. Was it 20 second? Five minutes?
I ended up having to do it twice since the first attempt was a failure. I held the iron down for about a minute, but when I removed the paper, half of the image did not adhere to the board.
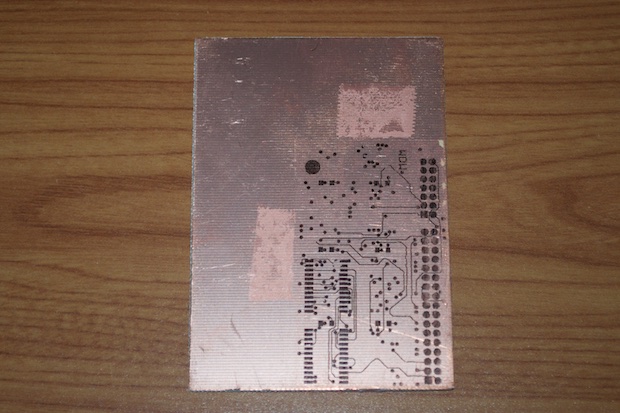
I've made
PCBs at home before, so I knew by looking at it that the toner was far too light. The etchant is going to eat right through it. This transfer paper is kind of cheap. At minimum, it'll eat away at the edges of all the pads, giving everything a rough look.
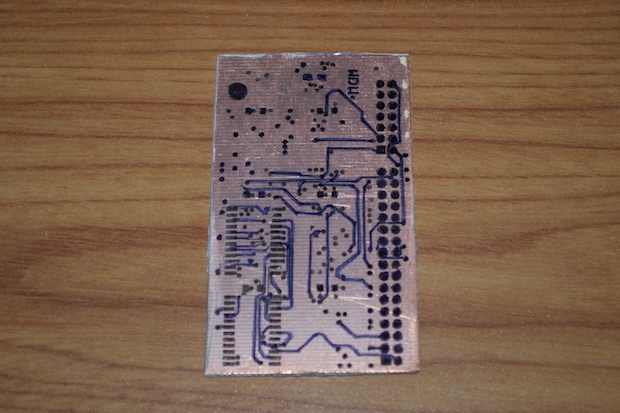
I also thought that the traces were too thin to withstand the treatment. I should have made them thicker, but too late now. I took a black Sharpie marker and touched up the whole board.
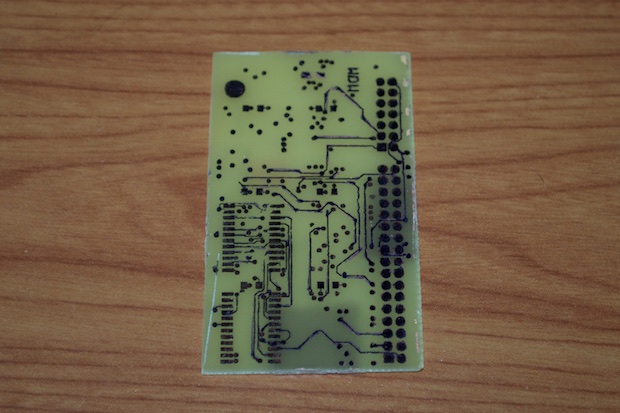
I then dipped it in the etchant solution until all the copper was gone. I didn't realize that I had left some tape residue on the back of the board. Needless to say, the etchant solution didn't dissolve the copper underneath. Since this PCB is somewhat translucent, you can see the patches on the back.
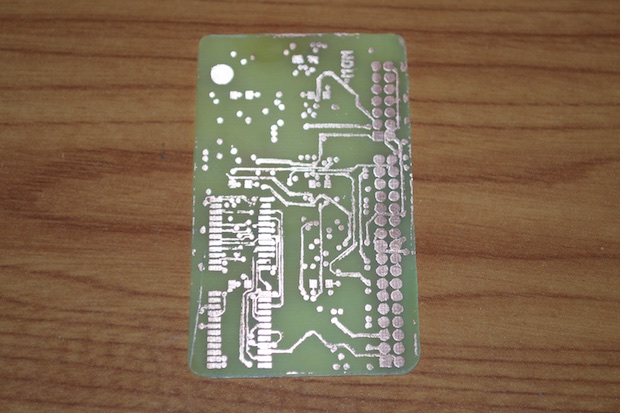
I took my Dremel and sanded off the copper that was on the back of the board. I then took some steel wool and buffed off all the toner. Nice and shiny!
It's not my best work, but I think it'll do the job. Maybe one day if I get a CNC mill or a laser cutter, I'll revisit this, but for now it'll do the trick. If anyone who's seen The Fifth Element knows what this is when they see it, then I think I've nailed it.
I then sanded the sides down to square the whole thing off. I took a little too much off the bottom, but it was really crooked.
I think I'll hit it with a top coat sealer to stop it from oxidizing. I'd normally go with some liquid tin, but the PCB in the movie is definitely a copper color. To stay as close to the movie as possible, I'd like to leave the copper color the way it is.
I just had to make a few last-minute adjustments to the back of the clock and print it out. I included a little cutout so that I can hang it on the wall.
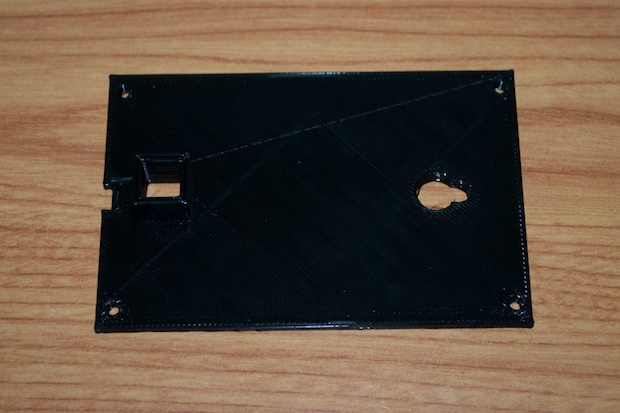
It fits perfectly. I included holes for some 4-40 screws, but it probably didn’t even need them. The back cover snaps right on.
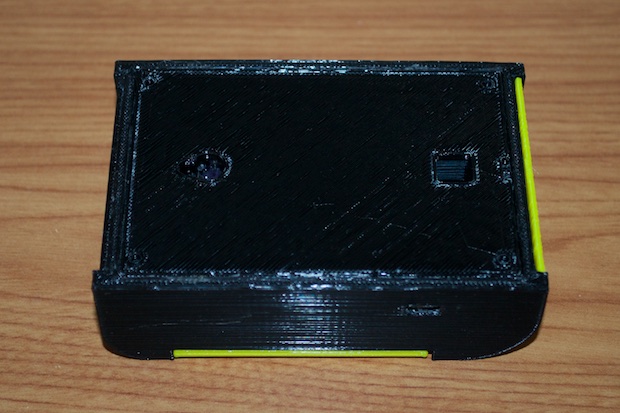
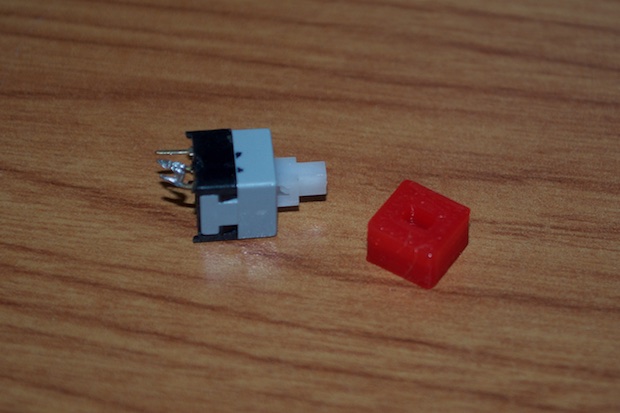
I also printed a small red cap for the power button.
I can still easily click it even though it sits nice and flush with the back cover.
I original leads I had soldered in for the power button were too short once I installed the button into the back. I had to lengthen them and cover the connections with some heat shrink tubing. I could have used one length, but then I’d have to take the whole thing apart in order to solder them directly to the PCB.
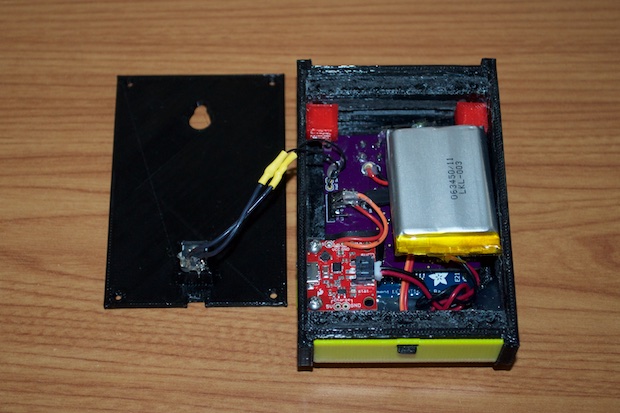
The last thing to do was connect the battery and secure the back panel. I have no idea how long the battery lasts, but this is more of a desk prop than anything. This clock came out great and I’m really happy with the results.
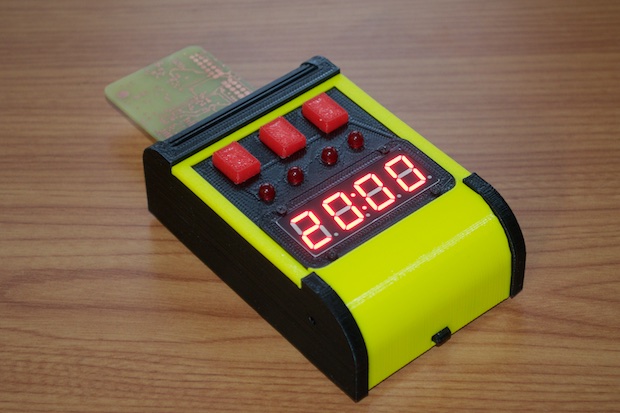
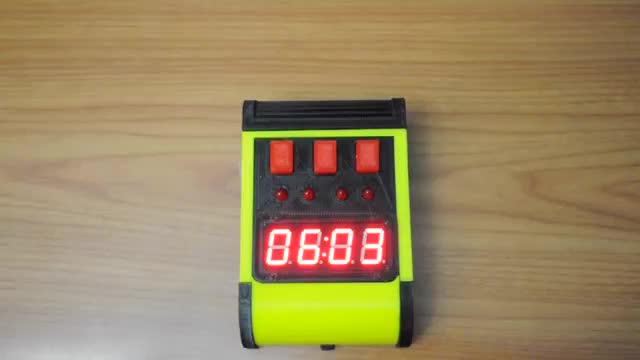
Here it is in action…
 See this project from start to finish:
The “Zorg Door Bomb”…Clock - Part I The “Zorg Door Bomb”…Clock - Part II The “Zorg Door Bomb”…Clock - Part III

