If you've been following along lately, you know I've been
juggling multiple projects. It's probably not the best way to do things, but it all just sort of happened.
After a few weeks of jumping back and forth between projects, things are really starting to come together. Some of these projects are finally starting to see a finish line. Case in point, the 3" LCD Clock. I finally got in all my PCBs.
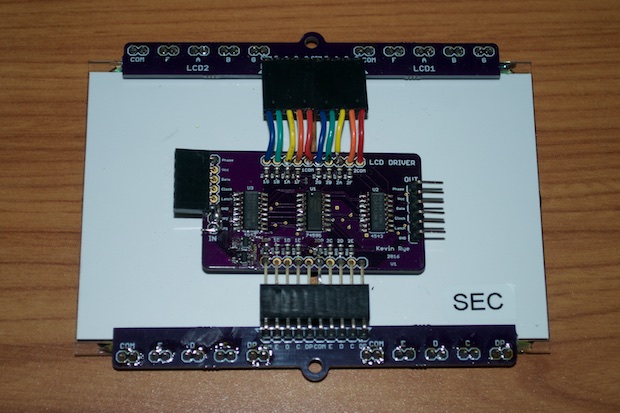
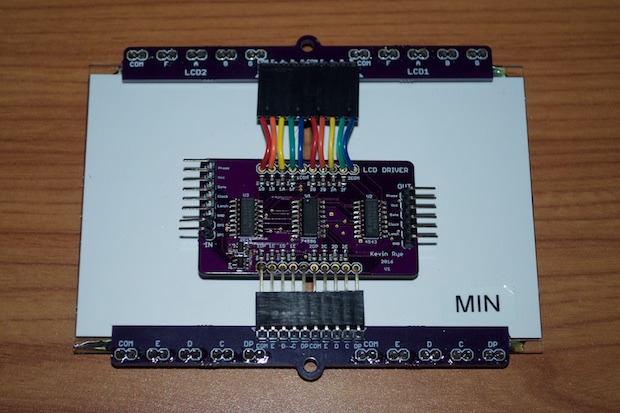
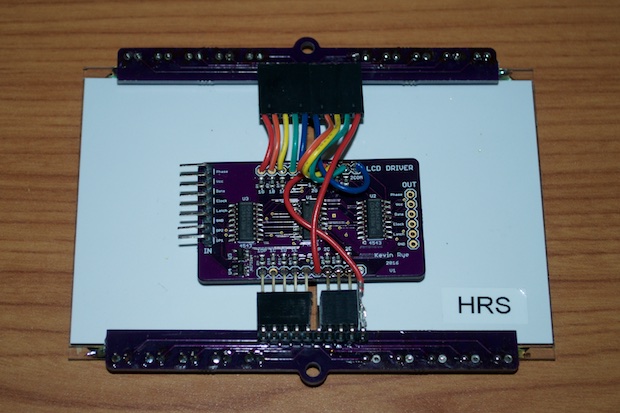
The PCBs for the hours, minutes, and seconds display modules are identical. They'll just be wired differently.
On the driver boards, data flows in from the left out to the next section on the right. It's all pretty straightforward with the exception of the decimal points. Since the 4543 driver chips only have outputs for the seven segments, and not the decimals, I had to drive the segments separately. What I did was route the 60Hz square wave that goes to the 4543 through an inverter and out to the decimals. All I have to do to turn the decimals on or off is turn the inverters on or off.
Since no decimal points will be used on the seconds section, I just shorted the header pins for the inverters to ground to drive them low. It’s not a matter of just not connecting the decimals to anything. Leaving the inputs to the inverters floating, or not installing them at all results in some weird blanking on the decimals.
The minutes section is identical to the seconds section except that only one decimal will be turned on. One header pin will be driven high, while the other will be driven low.
The hours section is a different story, and required a little bit of finagling. Both decimals will be used on this section. However, the tens-of-hours LCD is installed upside down so that I can use the decimal as a PM indicator. This required me to wire the common, G segment, and decimal segments a little differently. Just like the minutes section, there are two additional header pins installed so that I can drive the mins/hour separator decimal high, and the PM indicator low/high as required.
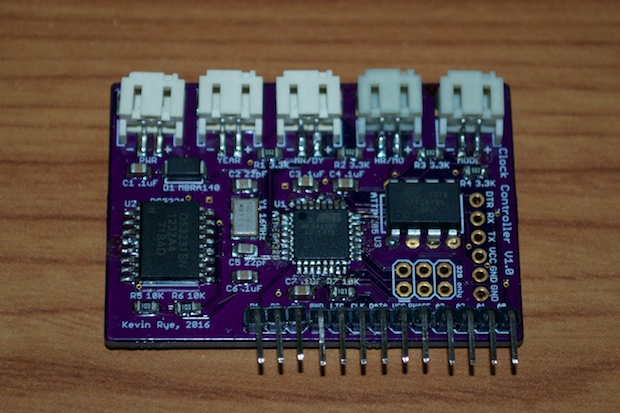
The final PCB is the brains of the operation: the main controller board. At first blush, this appears to be one of my standard-issue clock PCBs with an ATmega328, a DS3231 with battery backup, and a bunch of set buttons. However, this board also has an ATtiny85 on board that is dedicated to outputting the 60Hz square wave that drives the backplane of the LCDs.
The main controller board connects to the seconds section with a 6-pin male/female header. The seconds/minutes and minutes/hours connections are made with a 6-pin ribbon cable. All the decimal points are connected with 1 or 2-pin jumper wires. It's great that all the sections go together without having to solder anything. It's completely modular. I have some blue tape on there for now just to hold things together until I can put it into an enclosure.
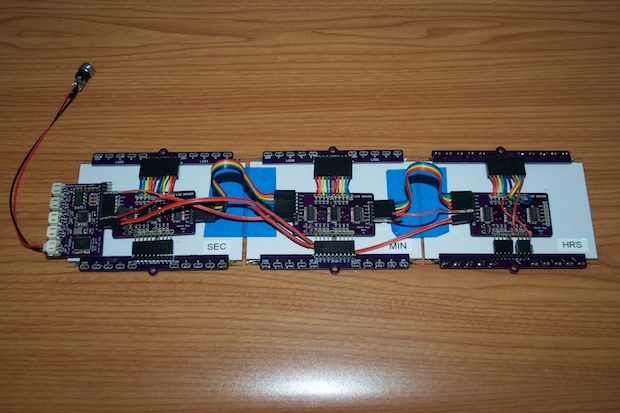
It just needs a little cable management. The ribbon cables between each section are about two inches too long. I'll need to cut them down, but before I can do that I'll need to get my hands on a proper crimper to redo the pins on the ends.
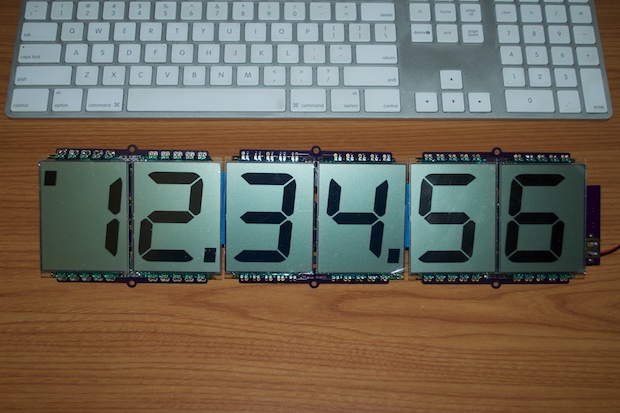
I still have to put the finishing touches on the code, so to test the assembly, I'm just displaying "123456". Basically ”hello world". Everything works; including the decimals points. The ones that should be on are on, and the ones that should be off are off.
This clock is going to be pretty massive. I don't have a
banana for scale, so my keyboard will have to do.
 See this project from start to finish: LUMEX 3" 7-Segment Displays 3" LCD Clock - Part I 3" LCD Clock - Part II
 3" LCD Clock - Part III
3" LCD Clock - Part IV 3" LCD Clock - Part V 3" LCD Clock - Part VI
